
Is your tile grout looking dull, cracked, or stained?
Tired of the outdated look or frustrated with stubborn grime? Removing tile grout might seem like a daunting task, but with the right tools and techniques, it’s a project you can tackle yourself!
This guide from Dex Flooring blog will walk you through the different methods for removing grout, from simple scraping to using power tools. We’ll discuss the pros and cons of each approach, safety tips to keep in mind, and how to ensure you don’t damage your precious tiles in the process.
Whether you’re refreshing a small bathroom floor or completely redoing your kitchen backsplash, this guide will empower you to remove grout with confidence and pave the way for a beautiful, updated space.
Ready to get started? Let’s dive in!
Removing Grout in Tile Seams: A Step-by-Step Guide
Grout, while crucial for protecting your tiles from water damage, can become cracked, stained, or simply outdated. Thankfully, removing it isn’t as scary as it sounds! Here’s a step-by-step guide to help you navigate the process:
Before You Begin:
- Safety First: Wear gloves, goggles, and a dust mask to protect yourself from dust and debris. Ensure good ventilation in the workspace.
- Gather Your Tools: Choose the method that best suits your needs and gather the necessary tools (see method options below).
- Protect Your Surroundings: Cover fixtures, drains, and surrounding areas with drop cloths to minimize mess.
Method Options:
There are several ways to tackle grout removal, each with its own advantages and limitations:
1. Manual Removal:

- Tools: Grout saw, grout removal tool, utility knife, scraper, hammer.
- Pros: Affordable, precise control.
- Cons: Time-consuming, physically demanding, risk of damaging tiles.
Steps:
- Score the Grout: Use a grout saw or removal tool to score along the grout line, creating a shallow groove. Be careful not to scratch the tiles.
- Break Up the Grout: Use a hammer and chisel or a utility knife to carefully break up the grout into smaller pieces.
- Scrape and Vacuum: Scrape away the loosened grout with a grout removal tool or scraper. Vacuum frequently to prevent dust buildup.
- Clean Up: Use a damp sponge to remove any remaining dust and debris.
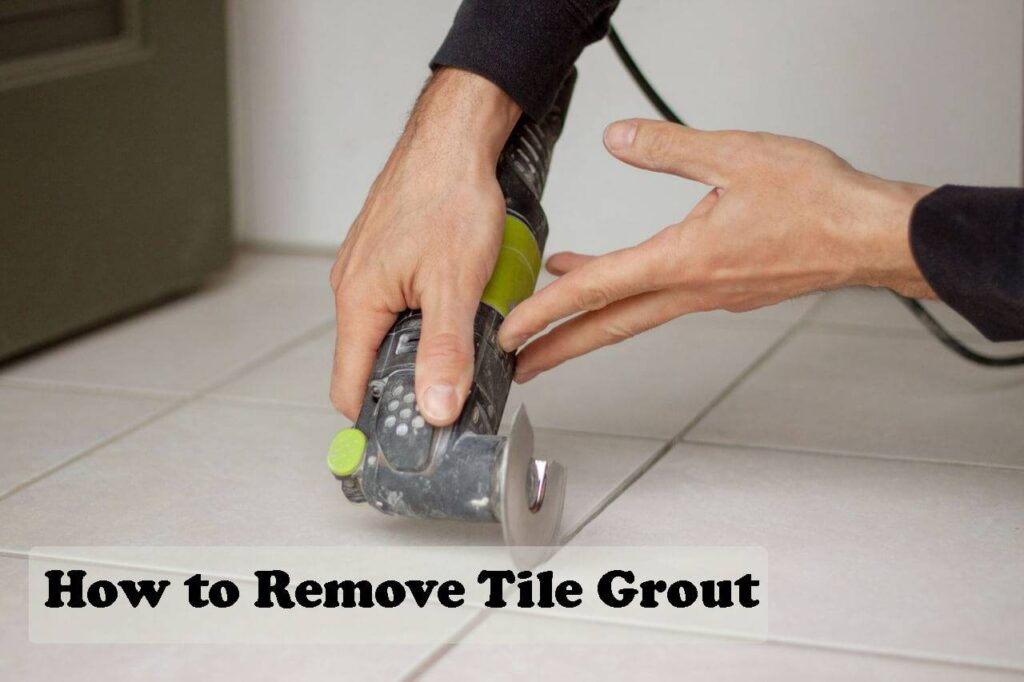
2. Power Tool Removal:

- Tools: Oscillating multi-tool with grout blade, reciprocating saw with grout blade.
- Pros: Faster, less labor-intensive.
- Cons: Requires caution to avoid damaging tiles, generates more dust.
Steps:
- Attach the Grout Blade: Choose a blade specifically designed for grout removal.
- Start in the Middle: Begin in the center of the tiled area and work your way out to avoid accidental damage near edges.
- Cut Carefully: Guide the tool slowly and steadily along the grout lines, keeping it flat against the surface. Be mindful of tile edges and adjust the depth as needed.
- Vacuum Often: Regularly vacuum up the dust created by the cutting process.
- Hand-Finish: Use a grout removal tool or scraper to remove any remaining grout in tight corners or areas inaccessible to the power tool.
- Clean Up: Thoroughly wipe down the area with a damp sponge.
3. Chemical Grout Removal (Use with Caution):

- Tools: Chemical grout remover, scraper, sponge, rubber gloves, respirator.
- Pros: Potentially faster than manual methods, may soften stubborn grout.
- Cons: Can be harsh on tiles and surrounding materials, requires strict safety precautions due to fumes and potential skin irritation.
Steps (Only use if absolutely necessary and with extreme caution):
- Read and follow all manufacturer instructions for the chosen chemical grout remover.
- Apply the remover sparingly and only to the grout lines, avoiding tiles and fixtures.
- Let the remover sit for the specified time, allowing it to soften the grout.
- Scrape away the softened grout with a scraper, working in small sections.
- Neutralize the remover with a solution recommended by the manufacturer.
- Rinse thoroughly with clean water and allow the area to dry completely.
Final Touches:
- Clean the Tiles: Once the grout removal is complete, thoroughly clean the tiles with a suitable cleaning solution to remove any residual dust or debris.
- Regrouting (Optional): If you’re replacing the grout, proceed with re-grouting the cleaned tile joints using appropriate materials and techniques.
Safety Tips for Grout Removal:
Always prioritize your safety when tackling grout removal! Here are some crucial tips to keep in mind:
Personal Protection:
- Never skip the gear: Wear safety glasses, gloves, and a dust mask to protect yourself from flying debris, dust, and chemicals. Consider a respirator for strong chemical fumes.
- Proper clothing: Wear long pants, closed-toe shoes, and appropriate protective clothing based on the method used (e.g., long sleeves for chemical use).
- Mind your hands: Wear cut-resistant gloves to protect your hands from cuts and scrapes, especially when using sharp tools.
Tool Safety:
- Read the manual: Before using any power tools, thoroughly read and understand the manufacturer’s instructions and safety warnings.
- Sharpen and secure: Ensure blades and tools are sharp and securely attached to prevent accidents.
- Start slow and controlled: Always begin with slow, controlled movements, especially when operating power tools. Don’t force the tools.
- Maintain awareness: Be mindful of your surroundings and the position of your body and hands while using any tools.
Dust and Fumes:
- Ventilation is key: Ensure proper ventilation in the workspace to minimize dust and fume inhalation. Open windows and doors, or use fans if necessary.
- Regular cleaning: Vacuum frequently to remove dust buildup, especially when using power tools.
- Chemical precautions: For chemical grout removers, always work in a well-ventilated area, wear a respirator, and strictly follow the manufacturer’s instructions and safety warnings.
Tile Protection:
- Choose the right tools: Select tools specifically designed for grout removal to minimize the risk of damaging tiles.
- Be gentle: Work carefully and avoid applying excessive force, especially near tile edges.
- Practice first: If unsure, practice on a scrap tile or inconspicuous area before tackling the entire project.
Additional Tips:
- Wet towels: Consider using damp towels around the work area to help trap dust and minimize its spread.
- Label and dispose of waste: Properly label and dispose of used tools, blades, and chemical waste according to local regulations.
- Be patient: Don’t rush the process. Take your time to ensure a clean and safe grout removal experience.
The Tools You’ll Need

The tools you’ll need for grout removal depend on the method you choose, but here’s a breakdown of what you might need for each method:
Manual Removal:
- Grout saw or grout removal tool: This helps score and break up the grout.
- Utility knife with a dull blade: Use this for carefully scraping stubborn grout.
- Scraper: Choose a scraper designed for grout removal to avoid damaging tiles.
- Hammer and chisel (optional): Useful for breaking up larger pieces of grout.
- Shop vacuum: Essential for vacuuming up dust and debris throughout the process.
- Safety glasses, gloves, and dust mask: Always prioritize your safety!
Power Tool Removal:
- Oscillating multi-tool with grout blade: A versatile tool for removing grout, but requires caution.
- Reciprocating saw with grout blade (optional): Faster for large areas, but use with extreme caution around tiles.
- Shop vacuum: Crucial for dust control with power tools.
- Safety glasses, gloves, and dust mask: Essential for all methods.
Chemical Grout Removal (Use with Caution):
- Chemical grout remover: Choose a product suitable for your type of grout and tile. Use with extreme caution!
- Scraper: For removing softened grout after applying the remover.
- Sponge and rubber gloves: For applying and rinsing the remover.
- Respirator: Essential for protection against harmful fumes.
- Safety glasses and gloves: Always required when using chemicals.
Additional Items (Regardless of Method):
- Drop cloths: Protect surrounding areas from dust and debris.
- Damp sponge: For cleaning up dust and residue after removal.
- Grout (optional): If you plan to re-grout after removing the old grout.
Conclusion: Grout Removal – More Than Just Removing Grout
Removing grout may seem daunting, but with the right approach and a bit of caution, it’s a project you can tackle yourself. Remember, it’s not just about removing grout; it’s about breathing new life into your tiled space.
By carefully considering your options, gathering the necessary tools, and prioritizing safety, you can conquer this task and unlock the potential of your updated tiles. Remember, patience and precision are key to achieving a clean and successful outcome.
Whether you choose the manual route, embrace the power of tools, or opt for a cautious chemical approach, empower yourself with the knowledge and safety tips provided here. With a little elbow grease and the right guidance, you can transform your tiled space and restore its beauty for years to come.
So, are you ready to get started? Pick up your tools, prioritize safety, and embark on your grout removal journey! Just remember, the end result will be worth the effort.
Grout Removal FAQs:
Q: Should I remove my grout myself, or hire a professional?
A: It depends on your comfort level, experience, and the size of the project. Removing grout can be physically demanding and requires caution. **For this reason**, if you’re unsure, hesitant, or tackling a large area, **it’s often wise to** hire a professional for their expertise and specialized tools.
Q: Which method is the best for removing grout?
A: There’s no “one size fits all” answer. **On one hand**, manual removal offers precise control but is time-consuming. **On the other hand**, power tools are significantly faster but require caution and can be more expensive. **Additionally**, chemical removers can be effective, **though** they demand strict safety measures and may damage tiles if misused. **Therefore**, choose the method that best aligns with your comfort level, available tools, and project scope.
Q: Can I damage my tiles while removing grout?
A: Yes—unfortunately, tile damage is a real risk. **In particular**, using the wrong tools, applying excessive force, or working carelessly can scratch, chip, or even crack your tiles. **To prevent this**, always select tools specifically designed for grout removal, work slowly and deliberately, and **if possible**, practice first on an inconspicuous area.
Q: Is regrouting always necessary after removing old grout?
A: Not always. **For instance**, if the removed grout was in good condition and you’re satisfied with its color, you may simply clean and seal the tiles instead. **However**, if the grout was stained, cracked, or discolored—or if you’d like a fresh look—regrouting is strongly recommended to ensure a clean, durable, and professional finish.
Q: What should I do with the removed grout dust and debris?
A: Dispose of it responsibly. **Specifically**, never flush grout debris down the drain, as it can clog pipes over time. **Moreover**, always wear gloves and a mask while handling the dust to protect your skin and lungs. **Once collected**, place the debris in a sealed bag and discard it with your regular household waste.
Q: Are there any special cleaning considerations after removing grout?
A: Yes—proper post-removal cleaning is essential. **Because** the tile edges are now exposed and more vulnerable, avoid harsh or acidic cleaners that could cause etching or discoloration. **Instead**, use a mild detergent mixed with warm water and gently wipe down the surface. **After cleaning**, allow the tiles to dry completely before proceeding with regrouting or sealing.
Q: Can I paint over existing grout instead of removing it?
A: This is not recommended. **In fact**, paint typically adheres poorly to porous grout and will likely peel, fade, or crack within a short time. **Consequently**, painting over grout rarely provides a lasting solution. **Ultimately**, removing the old grout and reapplying fresh material is the only reliable way to achieve a durable and aesthetically pleasing result.