
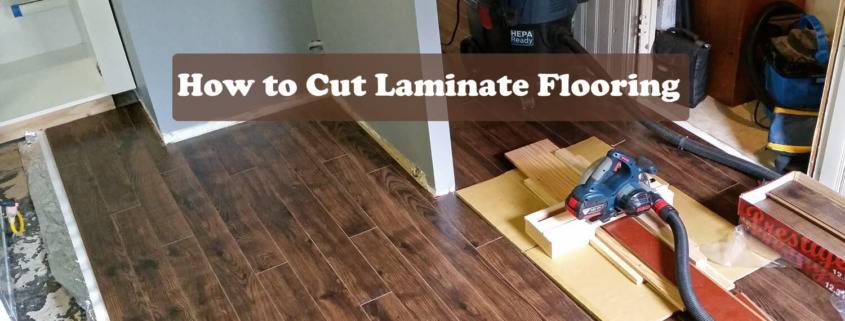
Don’t be deceived by the easy installation of laminate flooring! While DIYers love its click-and-lock simplicity, cutting this material necessitates a different approach than solid wood.
The reason is that laminate planks consist of layers. Although the core is sturdy fiberboard, the top is essentially plastic and paper, which can cause unsightly chipping during cuts. This has the potential to cause a disaster, particularly for exposed edges. But fear not! Clean cuts and a flawless laminate floor can be achieved with the right tools and techniques.
Ready to conquer your laminate flooring project? Dex Flooring has you covered!
Dex Flooring is your one-stop shop for all things laminate flooring. We offer a wide selection of beautiful, high-quality laminate planks at competitive prices.
Our friendly flooring experts are always happy to answer your questions and help you choose the perfect laminate flooring and tools for your needs. Visit your nearest Dex Flooring location today or browse our selection online!
Consider a Laminate Flooring Cutter
After the laminate flooring cutter king, here’s your guide to conquering cuts with power tools:
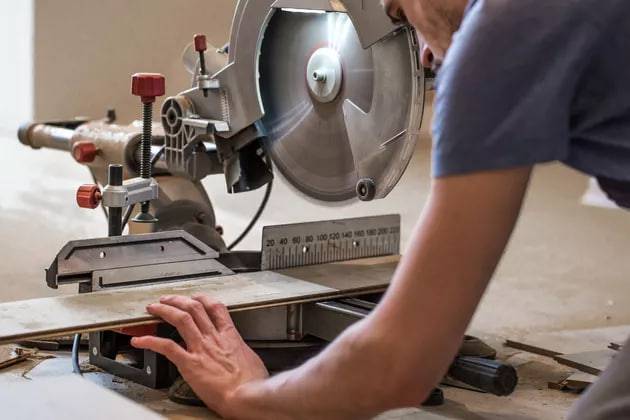
- Sliding Miter Saw: Ideal for crosscuts, this powerhouse handles planks wider than standard miter saws thanks to its impressive 12-inch cutting capacity. It’s a great investment for larger projects.
- Circular Saw: The DIY hero! Most laminate installers reach for this versatile tool. Consider a 3-inch blade option like the Dremel Saw Max for tighter spaces and easier handling.
- Table Saw: The rip cut champion! While not ideal for angled cuts or frequent crosscuts, a table saw excels at making long, straight cuts perfect for those first and last row planks (assuming they’re straight cuts).
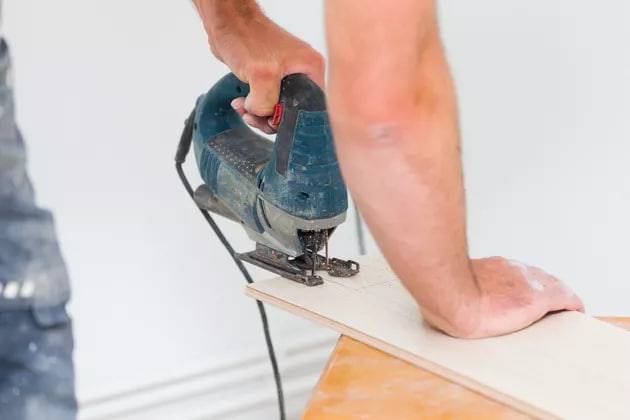
- Jigsaw: The jack-of-all-trades! Jigsaws aren’t the fastest or cleanest for straight cuts, but they can handle them in a pinch. Where they truly shine is tackling intricate cuts like curves, notches, and detailed work.
- Handsaws: Patience and practice are your allies here! Handsaws can tackle both rip cuts and crosscuts, but achieving clean and accurate cuts requires some finesse. For super delicate cuts, consider specialty saws like coping or pull saws.
Use the Right Blade
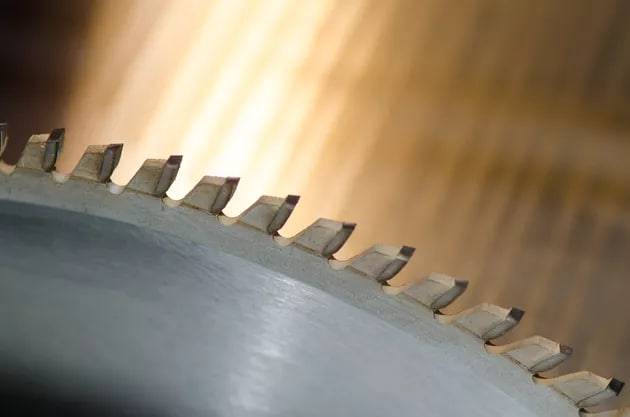
Even the best tools need the right ammo! To minimize chipping and achieve flawless cuts, Swiss Krono, a laminate manufacturer, recommends using high tooth count blades on your power saws. Here’s a quick guide:
- Circular Saw: Aim for a blade with around 60 teeth per inch (tpi) for clean cuts.
- Miter Saw: The higher the tooth count, the better. Choose a blade between 80 tpi and 100 tpi depending on your saw blade size.
- Jigsaw: For metal cutting blades used on laminate, a minimum of 14 tpi is essential. Avoid blades exceeding 30 tpi, as they cut slower and wear out quicker.
How to Cut Laminate Flooring Cleanly?
Every floor installation involves a variety of cuts: straight crosscuts, rip cuts for width adjustments, and even curved cuts around obstacles. Here’s your toolkit to conquer them all with clean precision:
Essential Gear:
- Tape Measure: For accurate measurements before every cut.
- Pencil: To mark your cutting lines clearly.
- Straightedge: Ensures perfectly straight cuts, especially for rip cuts.
- Masking Tape: Protects the laminate surface from scratches while marking or using a utility knife.
- Utility Knife (Optional): For scoring thin laminate before snapping a clean cut.
Conquering Cuts: Step-by-Step Guide
Now that you’ve assembled your cutting arsenal, let’s put it to use! Here’s a step-by-step guide to achieving clean cuts:
Step 1: Cut From the Back (Minimize Chipping)
- Measure & Mark: Grab your trusty tape measure and pencil. Measure your cut length and mark a line on the backside of the board using a straightedge for ultimate precision.
- Cut with Confidence: Follow your marked line with your chosen saw (miter saw, circular saw, or jigsaw) to minimize chipping on the front, the show side of your floor.
Step 2: Cut Tongues With a Utility Knife
- First Row, Special Needs: For the first row of planks, you’ll need to remove a section of the tongue (the interlocking groove) to ensure a clean fit against the wall while maintaining the expansion gap.
- Utility Knife Advantage: This cut would be a challenge for a saw, but a sharp utility knife can easily slice through the fiberboard tongue material.
Step 3: Rip Angles With a Circular Saw or Jigsaw
- Mark & Secure: Planning an angled rip cut for that first or last row? Mark your cutting line on the backside of the plank using a straightedge or chalk line for accuracy. Clamp the plank to your work surface, ensuring the cutting line overhangs the edge.
- Optional Guide: For extra control, clamp a long straightedge (like a level or board) to act as a guide for your saw’s base.
- Saw Power: Now, with confidence, make the cut using your circular saw or jigsaw.
Cutting Laminate Boards in Place
Let’s face it, accidents happen. If a laminate board gets damaged and needs to be removed, here’s how to tackle it without damaging the surrounding floor:
Your Cutting Weapon:
- Circular Saw (Standard or Mini): A standard circular saw works, but a 3-inch mini saw offers greater maneuverability in tight spaces.
Precise Cuts are Key:
- Set the Saw Depth: Adjust the saw depth to match the exact thickness of your laminate flooring. This ensures the cut penetrates the plank but minimizes damage to the underlayment.
- Parallel Power: Make two parallel cuts along the length of the damaged board, roughly 2 inches apart. Stop these cuts just before reaching the adjacent boards to avoid damaging them.
- Chisel in – Finish the Cuts: Carefully use a chisel to complete the two parallel cuts, separating the 2-inch waste strip from the rest of the board.
- Diagonally Dominant: Make four diagonal cuts outwards towards each corner of the remaining plank section. Again, use your trusty chisel to finish these cuts.
- Piece by Piece Removal: With the diagonal cuts complete, you can now remove the triangular waste pieces. Finally, gently pry out the two remaining larger sections of the damaged board.
Final Words
With the right tools, techniques, and a bit of practice, you can achieve clean, professional-looking cuts on your laminate flooring project. Remember, the key is to minimize chipping by using the appropriate saw and blade for the job, and always cutting on the backside of the plank whenever possible. So, grab your tools, follow these steps, and get ready to create a beautiful laminate floor!
Laminate Flooring Cut FAQs
Q: Can I score the laminate with a utility knife before cutting with a saw?
A: Absolutely! Scoring a shallow line with a sharp utility knife can help prevent chipping, especially when making long cuts.
Q: Are there any special saw blades available specifically for laminate flooring?
A: Yes! Look for blades with a high tooth count (60+ tpi for circular saws, 80-100 tpi for miter saws) designed for fine finishes on wood and laminate materials.
Q: I’m worried about damaging the subfloor when cutting planks in place. Any tips?
A: Minimize the risk by using a mini circular saw with a depth set to exactly match the thickness of your laminate flooring. This ensures the cut won’t penetrate too deeply and damage the underlayment.
Q: Is a laminate flooring cutter worth the investment?
A: If you’re tackling a large project and want perfectly clean, chip-free crosscuts, a laminate flooring cutter can be a real time-saver. However, for smaller projects, a standard saw with a high tooth count blade can achieve similar results.