
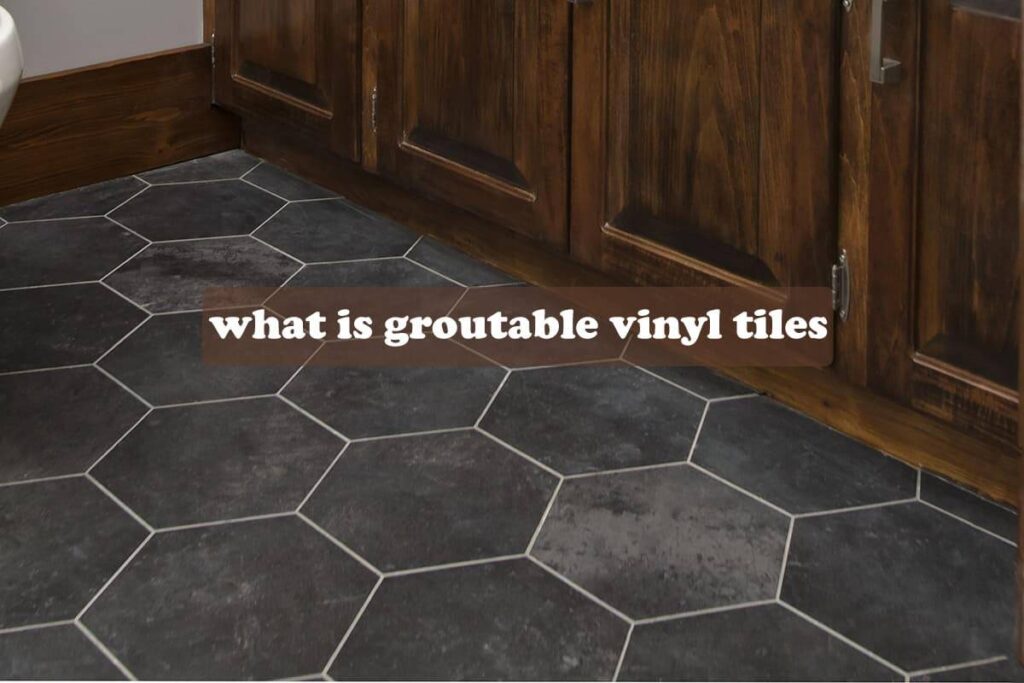
Groutable vinyl tiles are a type of luxury vinyl tile (LVT) that is designed to resemble ceramic or stone tile, but with the easier installation and lower cost of vinyl. They come in squares or planks and have a bevelled edge that creates a grout line impression when installed with actual grout. This gives them a more realistic look than standard LVT.
Groutable vinyl tiles are available in a wide variety of colors and styles, so you can find a look that complements your décor. They are also water-resistant and durable, making them a good choice for kitchens, bathrooms, and other high-traffic areas.
Pros of Groutable Vinyl Tiles:
- Realistic Look: The grout lines create a more convincing impression of real ceramic or stone tile compared to standard LVT.
- Easy Installation: Compared to ceramic or stone tile, groutable vinyl tiles are generally faster and easier to install. You don’t need specialty tools for cutting and grouting can be done relatively quickly.
- Versatility: They come in a wide variety of colors, styles, and patterns, allowing you to find something that matches your décor.
- Water Resistance: These tiles are suitable for moisture-prone areas like kitchens, bathrooms, and laundry rooms.
- Durability: Vinyl is generally tough and can withstand wear and tear from everyday use.
- Comfort: Vinyl is softer underfoot than ceramic or stone tile, making it more comfortable to stand on for long periods.
- Cost-Effective: Groutable vinyl tiles are generally less expensive than real ceramic or stone tile.
- Easy Maintenance: They are relatively easy to clean and maintain.
Cons of Groutable Vinyl Tiles:
- Grouting Process: While faster than real tile, grouting can be messy and time-consuming, requiring extra care during installation.
- Lower Durability: Although durable, groutable vinyl tiles aren’t quite as tough as ceramic or stone tile and may be more prone to scratches or dents.
- Subfloor Requirements: They may not be suitable for all subfloors, especially uneven ones. Make sure your subfloor is properly prepared before installation.
- Limited Lifespan: While lasting for many years, vinyl tiles typically won’t last as long as ceramic or stone tile.
- Not Real Tile: Despite the realistic look, they are still vinyl and may not have the same resale value as a real tile floor.
Overall, groutable vinyl tiles offer a good balance of affordability, ease of installation, and aesthetics. They are a great choice for areas where you want a realistic tile look without the hassle and expense of real tile. However, if you prioritize ultimate durability or resale value, then real ceramic or stone tile might be a better option.
Where can I use groutable vinyl tiles?
Groutable vinyl tiles are a versatile option for many areas of your home, but there are some key factors to consider depending on the space. Here’s a breakdown of where they shine and where there might be limitations:
Great for:
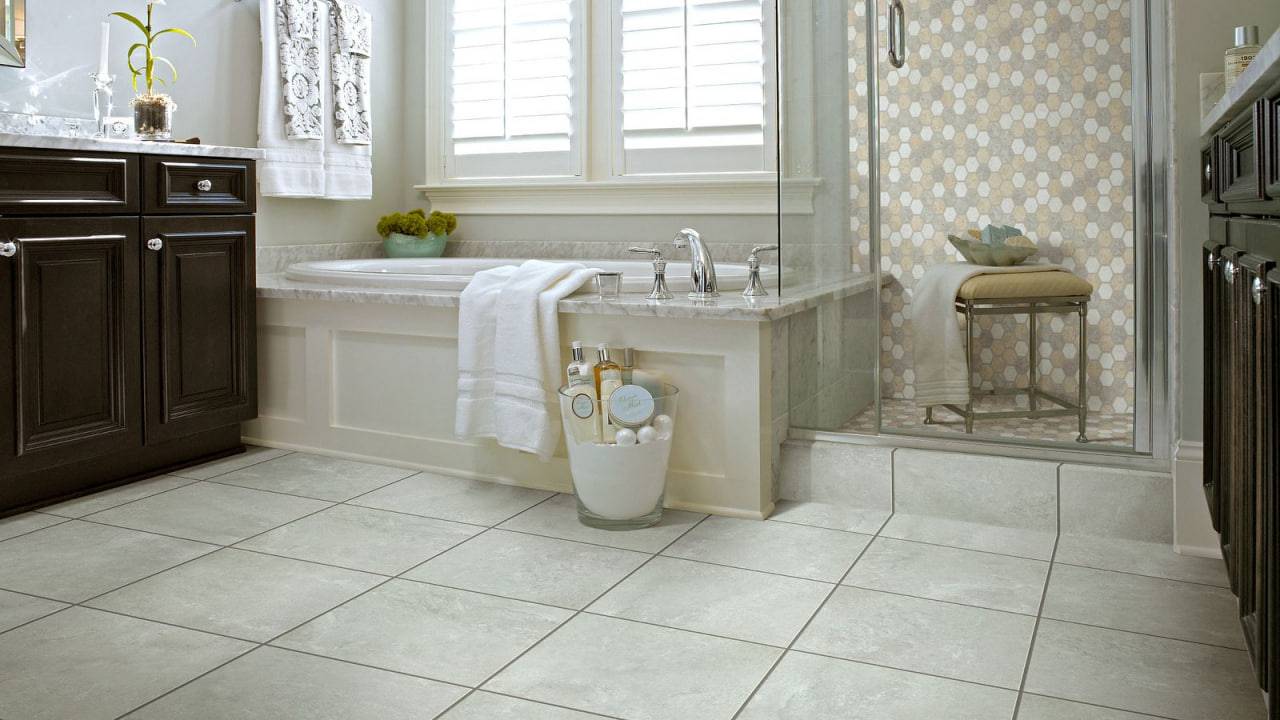
- Kitchens: Their water resistance makes them ideal for spills and splashes.
- Bathrooms: They can handle moisture and humidity well.
- Laundry Rooms: Durable and easy to clean up spills or drips.
- Mudrooms and Entryways: Can take the wear and tear of coming in from outside.
- Basements: Water resistant and comfortable underfoot on potentially cold floors.
- Living Rooms and Dining Rooms: Can add a touch of elegance with the realistic tile look. Consider the potential for scratches from furniture in high-traffic areas.
Use with Caution:
- Sunrooms or Conservatories: Direct sunlight might cause fading over time.
Additional Considerations:
- Subfloor: Ensure your subfloor is smooth, level, and free of cracks for a successful installation.
- High-Traffic Areas: While durable, heavy furniture or constant foot traffic might lead to faster wear and tear.
- Personal Preference: Consider the look and feel you desire. Groutable vinyl tiles offer a realistic tile look, but they won’t feel exactly the same underfoot as real tile.
Ultimately, groutable vinyl tiles can be a great choice for many areas of your home if you consider the pros and cons and choose them for suitable spaces.
How to install groutable vinyl tiles?
Installing groutable vinyl tiles involves several steps, similar to laying regular vinyl tiles with the addition of grouting. Here’s a general breakdown:
Preparation:
- Measure and Plan: Carefully measure your floor space and plan the tile layout to minimize cutting and ensure a good visual flow.
- Gather Materials: You’ll need the groutable vinyl tiles, grout (matching the tile color), grout float, bucket, sponges, utility knife, straight edge, spacers, and safety gear (gloves, knee pads, etc.).
- Prepare the Subfloor: Ensure the subfloor is clean, level, smooth, and free of debris. Fix any cracks or unevenness.
Tile Installation:
- Dry Layout (Optional): Many recommend laying the tiles out dry first to visualize the final pattern and make adjustments if needed.
- Cutting Tiles: Use a sharp utility knife and a straight edge to precisely cut tiles for edges and around fixtures.
- Apply Adhesive: Following the manufacturer’s instructions, spread the recommended adhesive onto the subfloor using a notched trowel.
- Lay the Tiles: Begin at your planned starting point and carefully lay the tiles, pressing them firmly into the adhesive. Use spacers to maintain consistent grout lines.
- Cutting and Fitting Around Fixtures: Meticulously measure and cut tiles to fit around toilets, cabinets, or other obstacles.
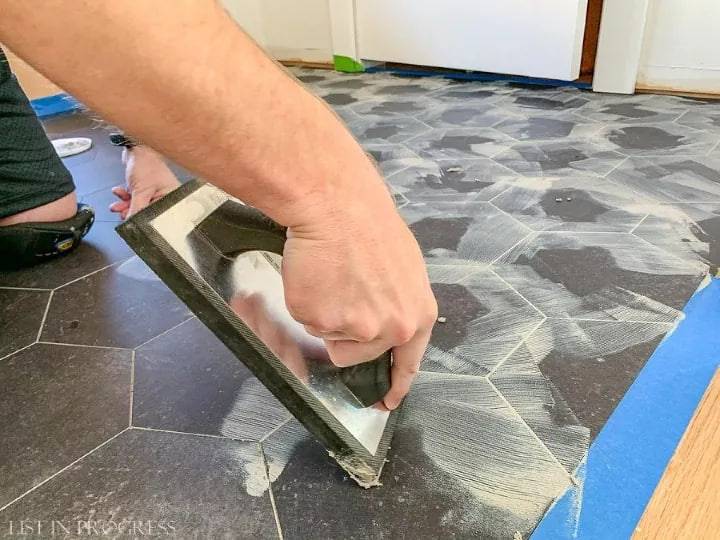
Grouting:
- Allow for Setting: Let the adhesive cure completely according to the manufacturer’s recommendations before grouting.
- Mix the Grout: Prepare the grout following the manufacturer’s instructions, typically mixing it with water to a desired consistency.
- Apply the Grout: Using a grout float held at a 45-degree angle, diagonally spread the grout across the tile joints, ensuring they fill completely.
- Remove Excess Grout: After applying the grout, regularly wipe the tile surface with a damp sponge to remove excess material before it dries. The goal is to leave grout in the joints and minimal on the tile surface.
- Cleaning and Finishing: Once the grout has started to set (usually around 20 minutes), use a clean, damp sponge to remove any grout haze from the tile surface.
- Allow Grout to Cure Completely: Let the grout cure fully for the recommended time (typically 24-48 hours) before walking on the floor or applying a grout sealer for extra protection.
Additional Tips:
- Wear gloves and other protective gear while working with grout, as it can irritate the skin.
- Work in small sections to manage the grouting process effectively.
- Regularly clean your tools, especially the grout float, to prevent grout build-up that can affect application.
- Take your time and be meticulous, especially during grouting, to achieve a clean and professional finish.
FAQs: Groutable Vinyl Tiles
Are groutable vinyl tiles trendy?
Absolutely! Groutable vinyl tiles offer a perfect blend of style and practicality. They capture the timeless elegance of real ceramic or stone tile with the ease of installation and affordability of vinyl. This makes them a popular choice for modern and contemporary design schemes.
What grout colors are trending for groutable vinyl tiles?
For a clean and modern look, thin grout lines in neutral colors like white, light gray, or beige are very popular. They complement a wide range of tile colors and create a seamless, unified appearance.
However, there’s also a trend towards bolder grout choices. This can be a great way to add a touch of personality or drama to your space. Dark gray, charcoal, or even contrasting colors can be used to define the tile pattern and create a distinct visual statement.
What tile sizes and shapes are trending with groutable vinyl tiles?
Larger format tiles, like planks that mimic wood flooring, are a big trend. They create a more open and spacious feel, especially in smaller areas. However, subway tiles and smaller square formats are still popular for kitchens, bathrooms, and laundry rooms, offering a classic and timeless look.
Are there any special installation techniques trending for groutable vinyl tiles?
The herringbone pattern is a hot trend that adds a touch of sophistication and visual interest. Tiles are laid in a zig-zag pattern to create a dynamic and eye-catching floor design.
Another trend is the use of grout release on the tile surface before grouting. This allows for easier cleaning and a flawless finish.
How can I use groutable vinyl tiles to create a trendy look?
- Mix and Match: Combine different tile sizes or colors within the same grout color scheme for a unique and modern twist.
- Play with Patterns: Explore herringbone or other non-traditional laying patterns to add visual interest.
- Embrace Bold Grout: For a statement piece, consider using dark or contrasting grout colors to define the tile pattern.
- Metallic Touches: Look for tiles with subtle metallic accents or pair them with metallic fixtures for a touch of glamour.
By incorporating these trends, you can use groutable vinyl tiles to create a stylish and up-to-date look in your home.