
Dream of uninterrupted flooring? In reality, different rooms require different materials. Brazilian cherry might look stunning in your living room, but for a bathroom, moisture-resistant porcelain is a must. Enter transition strips, your heroes for bridging these changes smoothly and stylishly.
Simply put, transition strips are the connectors between different flooring types. Think of them like mini bridges, seamlessly linking, say, the hardwood elegance of your dining room to the practical tile of your kitchen.
Seamlessly blending similar floors: with or without the strip?
While you can directly join similar flooring types (like ceramic to ceramic) without a transition strip, experts mostly recommend using one anyway. Here’s why:
- Expansion and contraction: Even similar materials expand and contract with temperature changes. Transitions help cover these subtle gaps, preventing them from becoming an eyesore or tripping hazard.
- Aesthetics: Even perfectly matched flooring might benefit from a visual break, especially if the shades or patterns differ slightly. A well-chosen transition strip can even enhance the design!
So, while a strip-free transition is technically possible, the practical and aesthetic benefits usually tip the scales in favor of incorporating a stylish connector.
Seamless Style: Carpet to Tile Transition Strip
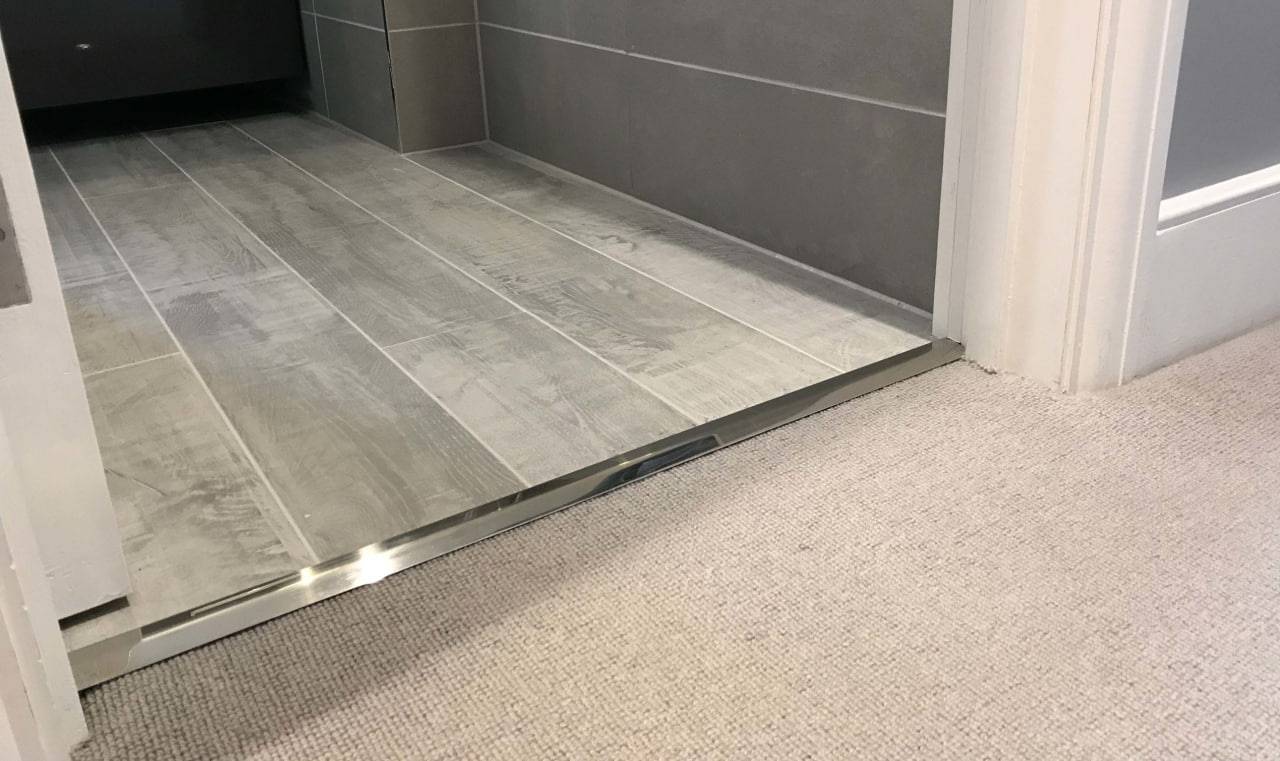
Say goodbye to clunky transitions and hello to effortless style! This clever strip is your secret weapon for connecting low-pile carpet and ceramic tile seamlessly.
Here’s how it works:
- Hidden hero: An invisible aluminum strip tucks snugly under your carpet’s edge, like a secret handshake. Tiny spikes grip the carpet firmly, forming a secure bond.
- Tile time: Your ceramic tile butts right up against this aluminum base, creating a clean line without any messy attachment.
- Bridging the gap: Finally, a stylish vinyl strip snaps into place on the aluminum track, forming a smooth bridge between both floors. It’s typically 2 inches wide, offering ample coverage.
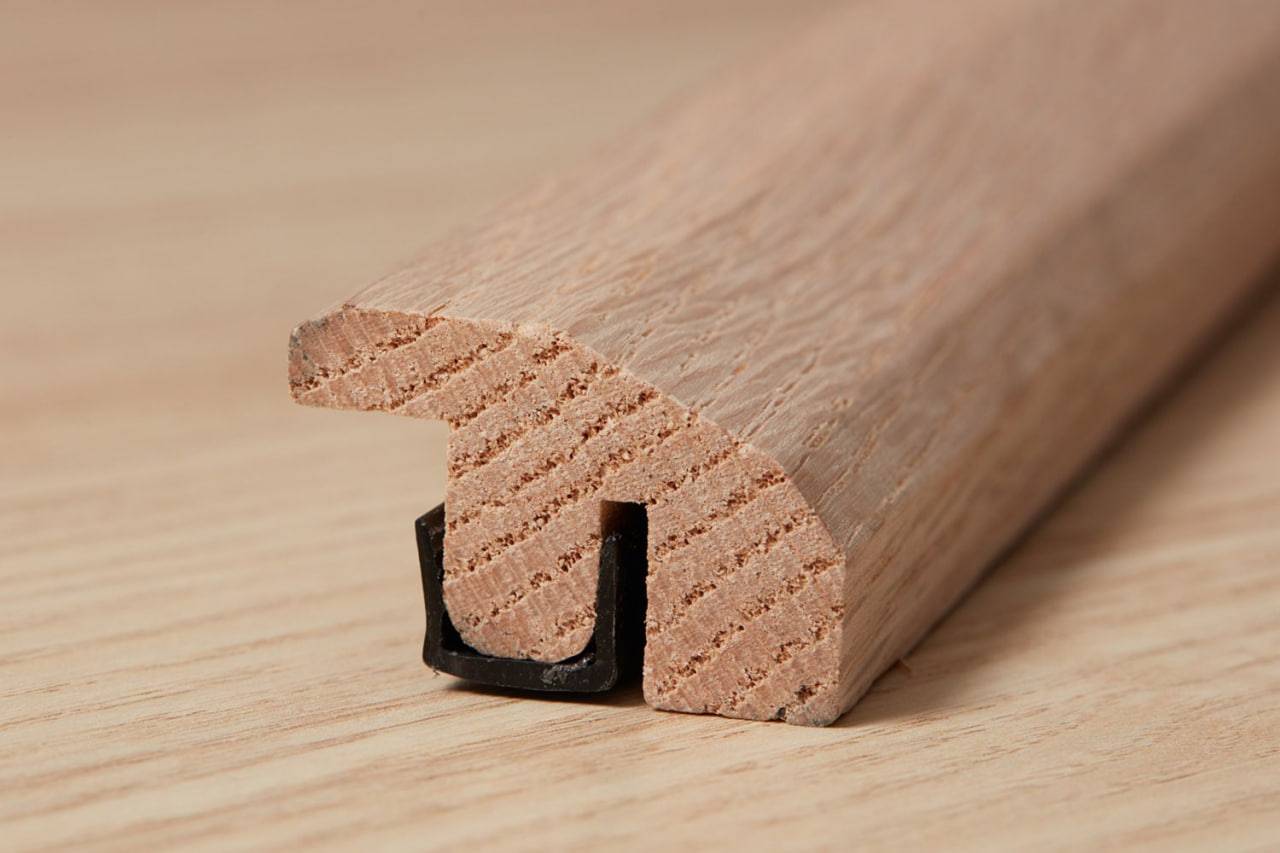
One Strip, Endless Possibilities: 4-in-1 Transition Strip
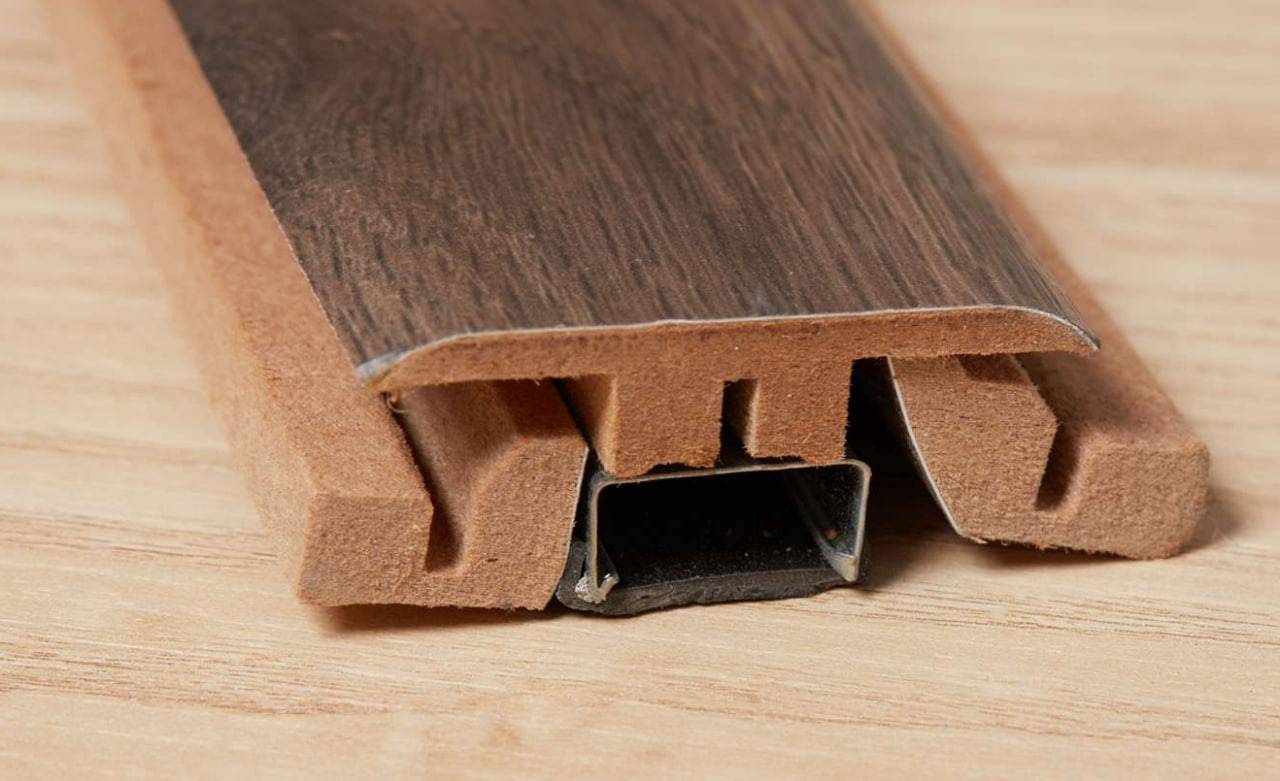
Imagine a transition strip that adapts to any situation, just like a trusty Swiss Army Knife! That’s the magic of the 4-in-1 transition strip – your one-stop shop for seamless floor connections.
How does it work?
It all starts with a versatile metal channel, the base for all transformations. Here’s where the interchangeable parts come in:
- T-Molding: Connect floors of the same height with this classic option, creating a neat and polished look.
- Carpet Strip: Say goodbye to bulky seams! This piece bridges the gap between your cozy carpet and any other flooring material.
- Hard Surface Reducer: Moving from thick hardwood or tile to thinner vinyl? This clever reducer creates a smooth transition and eliminates tripping hazards.
- End Molding: Need a finished edge for a single flooring type? This end molding is your answer, providing a neat and professional touch.
Bridging the Gap with Style: The Mighty T-Strip for Hard Surfaces
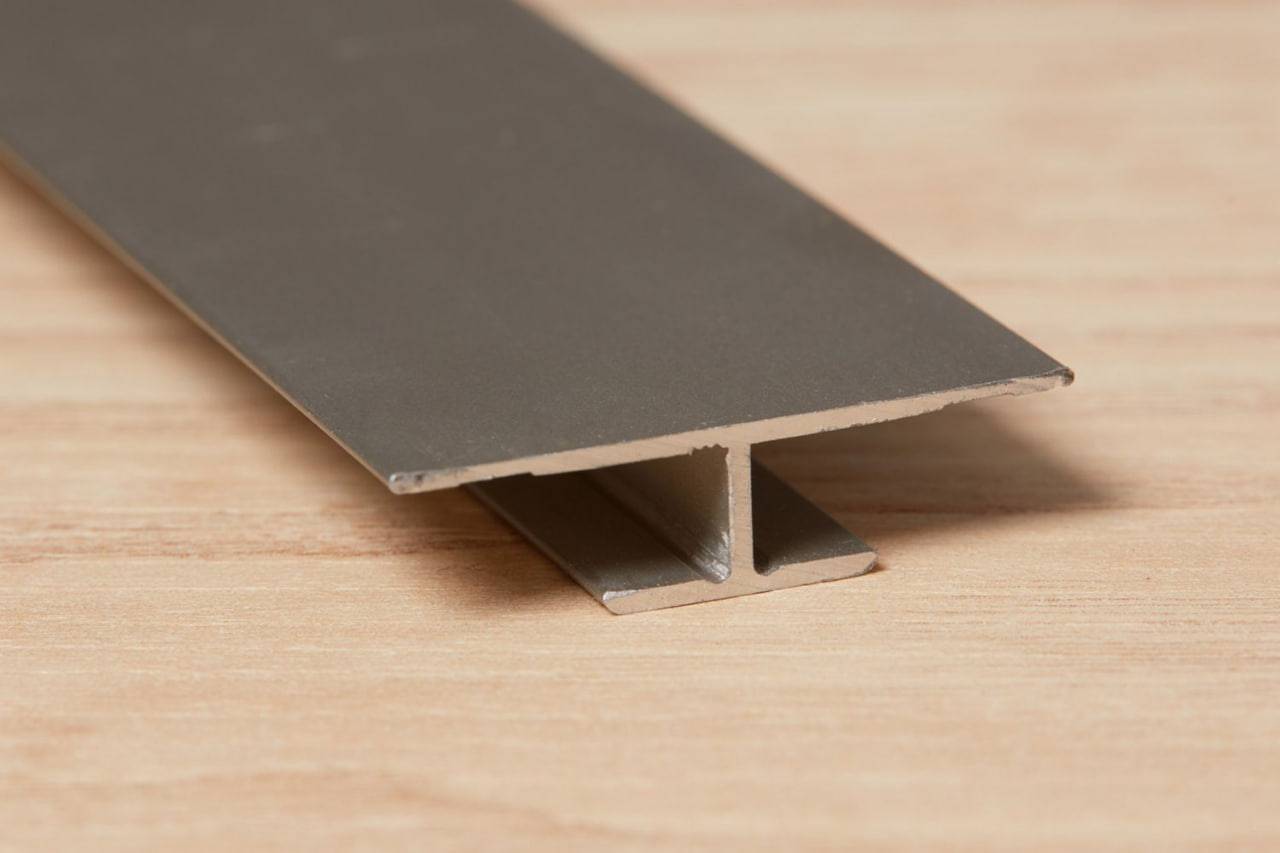
Imagine it: two stunning hard-surface floors meeting seamlessly, creating a unified flow in your home. Enter the T-strip, a champion of floor transitions.
This T-shaped aluminum hero works its magic on floors of the same height, connecting them with a clean and secure bond. Here’s how it shines:
- Installation made easy: Simply fill the joint between your floors with a special sealant, and then press the T-strip’s vertical arm firmly into the gap. The sealant does the magic, locking it in place.
- Snug fit, superior look: The top of the T sits flush with your flooring, creating a tighter fit than other transition strips. This means smoother transitions and less chance of snags or dirt buildup.
- Durable and dependable: Made from aluminum, this T-strip is built to last, handling high traffic and wear and tear with ease.
While available in various colors, finding a perfect aesthetic match for both floors might be a challenge. Additionally, keep in mind that these strips typically range from 2 to 5 inches in width, with 5 inches being more common.
So, is the T-strip right for you? If you’re looking for a strong, seamless connection between hard-surface floors of the same height, then absolutely! Just be prepared for some potential limitations in color options and size.
Bridging the Gap in Style: Mastering the Tile-to-Laminate Transition
Creating a smooth flow between your sleek laminate flooring and stunning tile? Look no further than the dedicated tile-to-laminate transition strip!
This hero comes in the form of a 2-inch wide hardwood strip, ready to be stained to perfectly match your laminate, ensuring a cohesive look. But here’s the clever part: it accounts for the height difference between tile and laminate.
Why the difference? Tile rests on cement board, while laminate prefers a thin foam underlayment. This transition strip addresses that with its molding featuring offset grooves. These clever indentations bridge the gap seamlessly, eliminating tripping hazards and maintaining a polished aesthetic.
Installation made simple:
- Metal channel takes the stage: Mount a metal channel embedded with expandable anchors between your floors, creating a secure base.
- Snap and go: The finishing touch! Simply snap the stained hardwood molding into place over the channel, and voila! Your transition is complete.
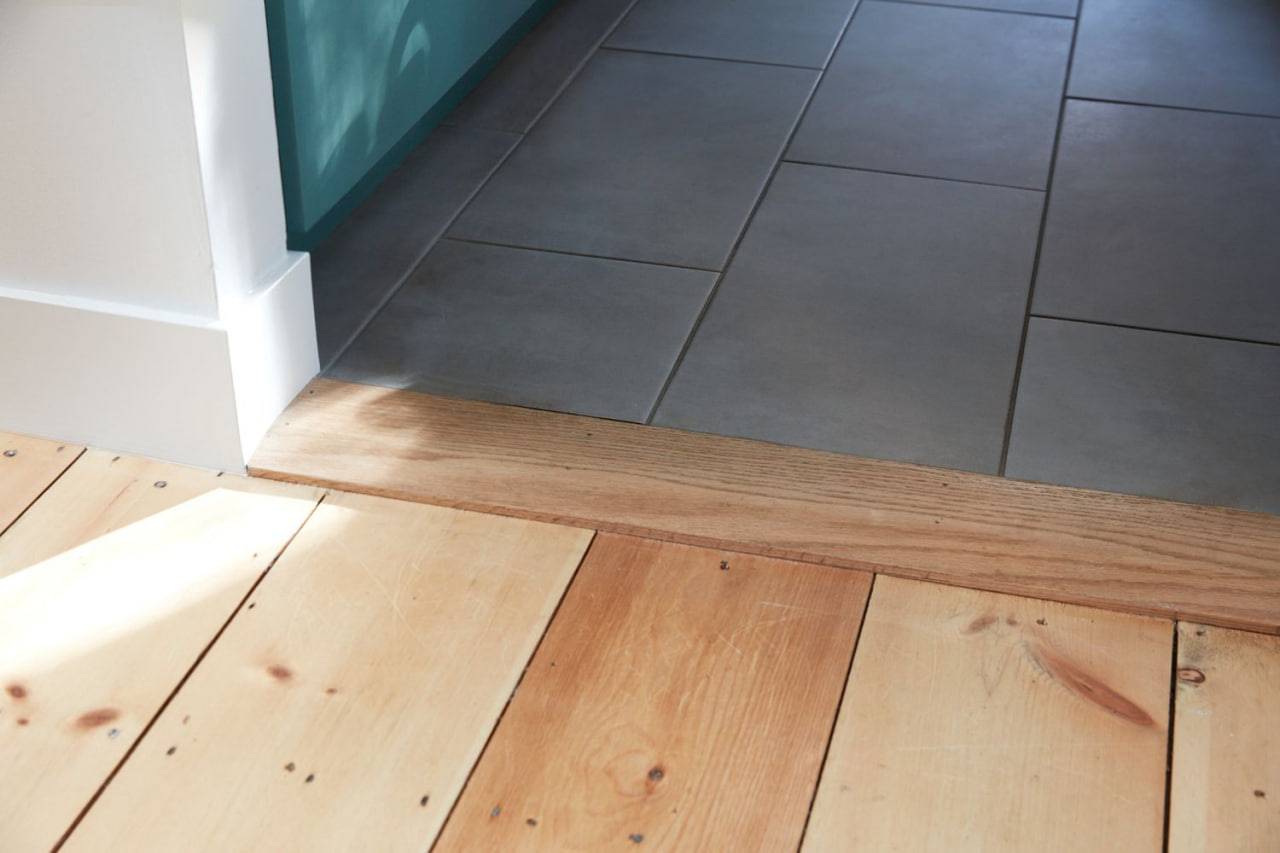
Bridging the Wood Gap with Ease: Unveiling the Wood-to-Wood Seam Binder
Imagine two beautiful wood floors dancing side-by-side, flawlessly connected by a bridge of style. That’s the magic of the wood-to-wood seam binder, a hero designed to seamlessly connect wood floors of equal heights.
Here’s how it works:
- Wide and sturdy: This 5-inch wide warrior, crafted from solid hardwood, boasts beveled edges for a smooth transition.
- Independent design: Unlike other strips, it doesn’t attach directly to either floor. Instead, it rests gently on the seam, allowing each floor to expand and contract freely without cracking the binder.
- Easy installation: Simply position the binder over the seam and secure it with screws through pre-drilled holes – you’re done!
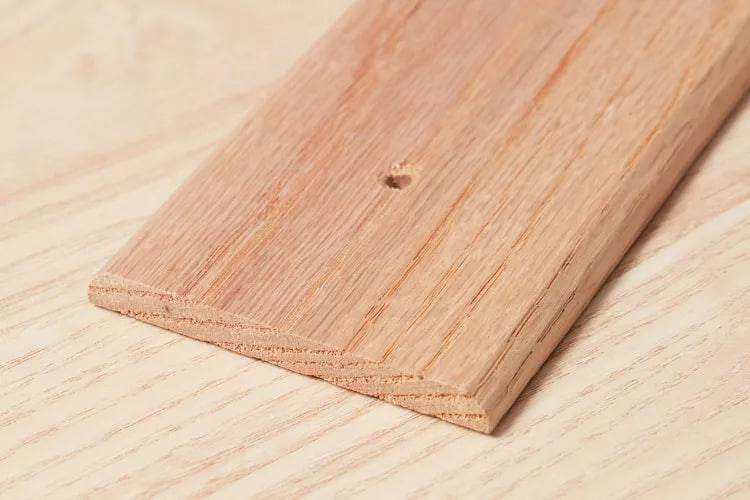
Bridging the Heights: Mastering the Vinyl-to-Tile Transition
Dreaming of a seamless flow from your cozy vinyl haven to the grandeur of your ceramic or stone tile? Look no further than the vinyl-to-tile transition strip, a champion at overcoming elevation differences!
Why the difference? Vinyl typically rests on a thinner underlayment compared to the higher profile of ceramic or stone tile. This transition strip bridges the gap with grace:
- Shaped for success: Imagine a gentle ramp crafted from solid hardwood, guiding you effortlessly from lower vinyl to higher tile. This strip features a sleek design that ensures a smooth and comfortable transition.
- Variety is key: Choose from widths ranging from 2 to 5 inches to perfectly match your specific needs and aesthetic preferences.
- Customization reigns: The unfinished hardwood strip is your canvas! Stain or paint it to seamlessly blend with both your vinyl and tile, creating a unified look.
Transition strips: The unsung heroes of seamless flooring
While you envision uninterrupted flows of beautiful materials, reality demands different floors for different needs. Thankfully, transition strips step in, bridging the gap with both practicality and style.
Beyond aesthetics: We explored various transition types, from the simple T-strip for even surfaces to the versatile 4-in-1 solution. Each tackles its task, bridging height differences, preventing tripping hazards, and covering expansion gaps.
More than just function: While functionality is key, don’t underestimate the aesthetic potential! From wood-toned bridges to color-matched vinyl strips, they can seamlessly tie your design together, even adding a touch of elegance.
So, embrace the transition strip! Don’t see it as a necessary evil, but a design element that enhances your dream home. With the right choice, you’ll achieve a beautiful, safe, and unified flow across your different flooring materials.
FAQs about Transition Strips:
Do I need transition strips between all flooring types?
While not always mandatory, transition strips are highly recommended for several reasons. They bridge height differences, prevent tripping hazards, cover expansion gaps, and can even enhance the aesthetics of your space.
How difficult is it to install transition strips?
Most transition strips are relatively easy to install, often requiring simple tools and techniques like snapping, screwing, or gluing.
What type of transition strip should I use for my hardwood floors?
For hardwood floors, consider wood-toned T-strips for even surfaces or seam binders for bridging seams between planks.
What about transitions between tile and laminate?
A dedicated tile-to-laminate transition strip with offset grooves is ideal for this situation, as it addresses the height difference and creates a smooth finish.
And for transitioning from carpet to vinyl?
Carpet edge grippers with teeth securely hold the carpet edge and transition to lower vinyl flooring.
Can I customize the color or finish of my transition strip?
Many transition strips come unfinished, allowing you to stain or paint them to match your existing flooring. Some also come in various pre-finished colors.
How can I make my transition strips look good?
Choose a strip that complements your flooring colors and styles. Consider the width and material carefully to blend seamlessly with your overall design.