
Squeaky floors – they can add an unwanted soundtrack to your daily life. But fear not! Fixing squeaky floors is an achievable task, and the benefits are plentiful. Not only will you enjoy a quieter home, but you’ll also address a potential underlying issue.
This guide will equip you with the knowledge to pinpoint the culprit behind the squeak, diagnose the cause, and finally, achieve blissful floor silence. Let’s get started!
Silence the Squeaks: Easy Fixes Before Digging In
Is your floor serenading you with unwanted squeaks? Before you grab the toolbox, here are some quick fixes that might bring sweet silence:
- Boost the Humidity: Dry air can make floorboards shrink and rub together, causing squeaks. Especially common in winter, a humidifier can add moisture back into the air, allowing the wood to expand and quiet the creaking.
- Lubricate with Powder: For tongue-and-groove hardwood floors, a sprinkle of powdered graphite can act as a lubricant. Simply locate the squeaky joint, apply some powder, and work it into the crack by stepping on it repeatedly. Repeat until the squeak disappears, then wipe away any excess with a damp cloth (no vacuuming!). Baby powder or talcum powder can also work in a pinch.
- Silence with Spray: Similar to the powder, a wood-safe dry lubricant spray can sometimes be the answer. Find a hidden area to test the spray for discoloration, then spray the joint thoroughly. Wear gloves and work the lubricant in with your fingers. Wipe away any excess and follow up with a floor cleaner.
If these quick fixes don’t banish the squeaks, a little investigation might be needed to identify the cause. But for now, enjoy the peace and quiet!
The Squeak Detective: Diagnosing Your Floor’s Woes
Why does your floor sound like a chorus of crickets? Floor squeaks happen when components rub together instead of staying put. It could be floorboards grinding on the subfloor, the subfloor protesting against the joists, or a whole orchestra of friction within your floor system.
Diagnosing the culprit is easier if you have access below the floor – through a crawlspace, unfinished basement, or a basement with a drop ceiling. With a helper flexing the squeaky spot, become a floor detective and examine from below for these red flags:
- Subfloor Blues: Is the subfloor not securely fastened to the joists? Look for loose nails or screws.
- Joist Woes: Are the joists sagging, damaged, or bowed unevenly? This can cause movement and squeaking.
- Shifting Components: Keep an eye out for any vertical or horizontal movement in floor system components – a sign of something amiss.
- General Disrepair: Are there any loose or damaged components that could be causing the squeak?
If you can’t access the underside or find an obvious culprit, the squeak might be coming from above the subfloor. Diagnosing this can be trickier, but don’t worry, we’ll tackle solutions in the next step!
When to Bring in the Floor Whisperer
You’ve become a squeak detective and inspected the floor from below. But what if you find something concerning?
Call in a professional if you see:
- Major Damage: Significant gaps or damage to the subfloor, joists, or other components.
- Foundation Issues: While uncommon, squeaks can sometimes signal bigger problems like foundation settlement.
- Hidden Culprits: Signs of termite or water damage, which can be tricky to diagnose for the untrained eye.
A professional can pinpoint the exact issue, recommend the best course of action, and ensure your floors are structurally sound and squeak-free. Don’t hesitate to seek help – a healthy floor system is an important part of a safe and comfortable home.
Conquering the Squeak: Solutions for a Quieter Floor
Now that you’ve identified the squeak culprit, it’s time to silence it! Here are some common fixes, but be sure to reference the specific materials needed for each method.
General Tools You’ll Need:
- Shims
- 2×4 pine board (optional)
- Construction adhesive or glue
- Pencil
- Utility knife
- Drill
- Drill bits
- Stud finder (for some methods)
- Breakaway screw kit (optional)
- Screws (various lengths, depending on method)
- Nails (various lengths, depending on method)
- Nail set
- Hammer
- Wood filler (optional)
- Sandpaper (optional)
Fixing with Shims (For Accessible Floors):
This method tightens gaps between the subfloor and joists, ideal for accessible floors (crawlspaces, unfinished basements).
- Locate the Squeak: Have a helper walk on the floor above while you pinpoint the squeak from below. Mark the spot.
- Shim Time: Slide a shim into the gap between the subfloor and joist until snug. Don’t force it! If possible, add another shim from the opposite side. Mark the shims where they meet the joist and remove them.
- Glue and Reinsert: Apply glue to the shims and the gap. Slide them back in and let the glue dry. For a clean look, use the utility knife to trim any excess shim.
Remember: These are just some solutions! We’ll explore other methods in the next section depending on the cause of the squeak.
For those tougher squeaks, here are some additional solutions:
Reinforcing a Joist with a Wood Block (For Larger Gaps or Damaged Joists):
If the gaps are big or the joists are damaged, “sistering” the joist with a wood block might be necessary.
- Measure and Cut: Measure the damaged area where the subfloor lacks support. Cut a 2×4 pine board 2 feet longer than that area.
- Glue and Screw: Apply construction adhesive to the top and side of the wood block. Place the glued block against the joist, ensuring one foot overlaps on each side of the damage. Secure it with 2½-inch self-drilling screws going into both the joist and subfloor.
Securing Flooring from Above (for inaccessible floors):
Some squeaks require access from above. Here’s how to tackle them:
- Locate the Joist: Use a stud finder to pinpoint the joist below the squeak and mark its location lightly with a pencil.
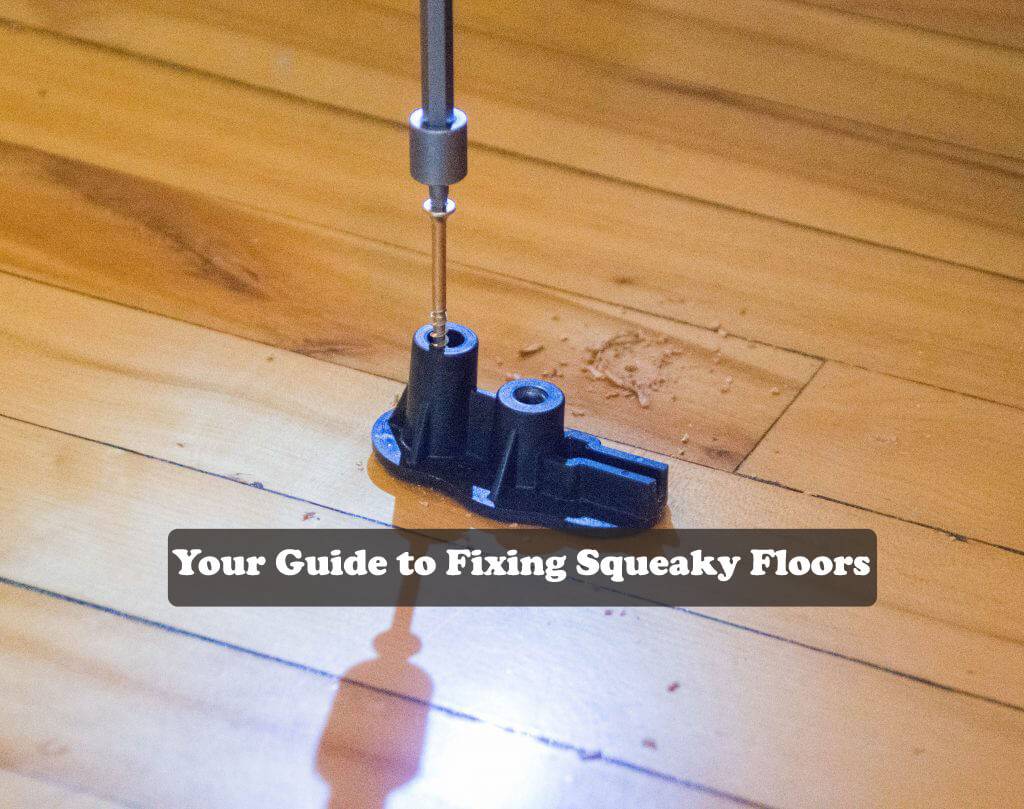
- Pilot Hole for Strength: Drill a pilot hole directly above the joist, using a drill bit slightly smaller than the breakaway screw. This helps avoid hitting wires or pipes and ensures a strong hold.
- Screw On, Snap Off: Use the breakaway screw with its dedicated tool. Insert the screw into the pilot hole and drive it in with a drill until it snaps off. The head will detach, leaving the threaded part to secure the floor discreetly. Fill the remaining gap with color-matched wood filler, sand it smooth, and your floor is squeak-free!
Pro Tip: If you’re not a hammer pro, this next method might be trickier. You can also drill a pilot hole and use a finish nail instead. However, be very careful when hammering the nail in, as a slip can damage the floor’s finish. Once the nail is in, use a nail set to push it further in and cover the hole with wood filler.
FAQs
Q: Can I fix squeaky floors myself?
A: In many cases, yes! This guide outlines several DIY solutions for common squeaks. However, if you’re uncomfortable with any of the methods or discover significant damage, it’s always best to consult a professional.
Q: How do I know if I should call a professional?
A: Call a professional if you see signs of major damage during your inspection, such as significant gaps, sagging joists, or potential termite or water damage. They can diagnose the exact cause and ensure a safe and lasting fix.
Q: What if my floor has wall-to-wall carpeting?
While some solutions require accessing the subfloor from below, this guide offers methods for fixing squeaks from above the floor as well. Look for the section titled “Securing Flooring from Above.”
Q: Are there preventative measures I can take to avoid squeaky floors?
A: Maintaining a consistent humidity level in your home can help prevent floorboards from shrinking and rubbing together. You can also minimize heavy traffic in high-use areas.
Q: What if I try everything in this guide and my floor still squeaks?
A: If none of the solutions seem to work, it’s best to call a professional for a more in-depth diagnosis and repair. There might be an underlying issue that requires specific expertise