
Homeowners choose vinyl flooring because it is durable, affordable, and easy to clean.
It is available in a range of styles and colors to complement any decor, and it can be installed in various rooms, including kitchens, bathrooms, and living rooms.
However, it is important to know how to properly install vinyl flooring to ensure a long-lasting and beautiful result.
We will give you a step-by-step guide on how to lay vinyl flooring like a professional in this article.
Our focus will be on everything from preparing the subfloor to installing transition strips and trimming the flooring.
To prevent common mistakes, we will offer tips and tricks.
This guide will help you lay vinyl flooring in your home, whether you’re a seasoned DIYer or a complete novice.
Preparing the Subfloor: A Tedious and Often Frustrating Task
While laying vinyl flooring may seem like a straightforward process, one crucial step often gets overlooked: preparing the subfloor. This often-overlooked step, however, is essential for a successful vinyl flooring installation.
A subfloor that is not properly prepared can lead to a number of problems, including:
- Unevenness: If the subfloor is uneven, the vinyl flooring will be uneven as well, which can be unsightly and make it difficult to walk on.
- Debris: Any debris, such as dirt, dust, or nails, can scratch the vinyl flooring and make it look worn prematurely.
- Moisture: If the subfloor is damp or contains moisture, it can damage the vinyl flooring and cause it to warp or buckle.
To properly prepare the subfloor, it is important to:
- Remove any old flooring: If you are replacing old flooring, be sure to remove all of the old flooring and any adhesive residue.
- Fill any cracks or holes: Use a patching compound to fill any cracks or holes in the subfloor.
- Sand down any uneven areas: Sand down any uneven areas in the subfloor to create a smooth surface.
- Clean the subfloor: Thoroughly clean the subfloor to remove any dirt, dust, or debris.
- Check for moisture: If you suspect that the subfloor is damp, use a moisture meter to check the moisture content. If the moisture content is too high, you may need to install a moisture barrier.
Once the subfloor is prepared, it is important to lay down a layer of underlayment. Underlayment provides cushioning and insulation for the vinyl flooring, and it also helps to protect the subfloor from moisture and damage.
Laying Underlayment: A Crucial Step for a Smooth Vinyl Flooring Installation
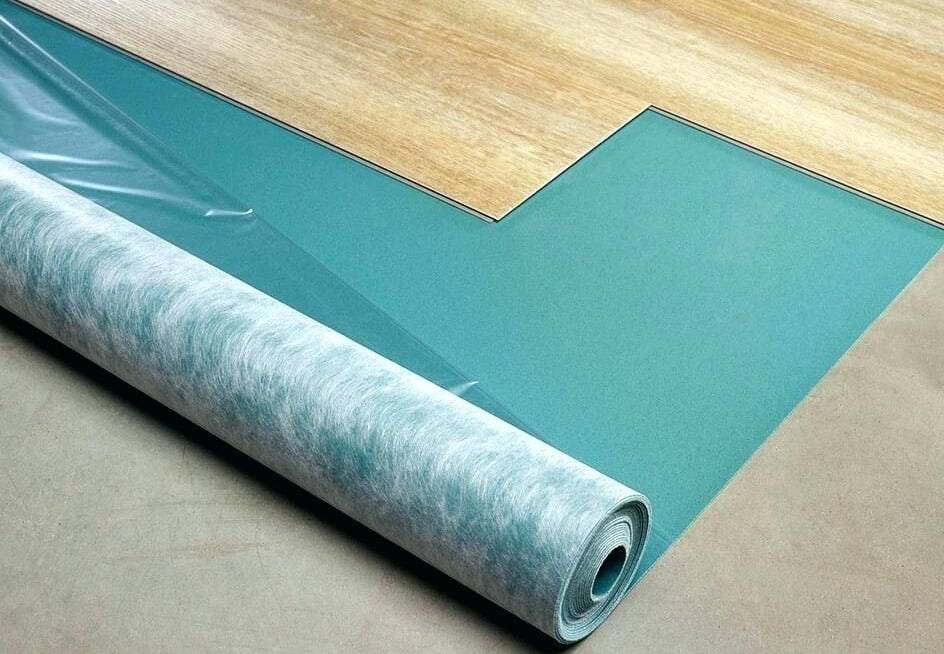
While preparing the subfloor is essential for a successful vinyl flooring installation, laying underlayment is equally important. A layer of underlayment provides a number of benefits for your vinyl flooring, including:
- Cushioning: Underlayment helps to provide cushioning under the vinyl flooring, which can reduce noise and make the floor feel more comfortable to walk on.
- Insulation: Underlayment can also help to insulate the floor, which can keep your home warmer in the winter and cooler in the summer.
- Protection: Underlayment helps to protect the subfloor from moisture and damage. This is especially important if you are installing vinyl flooring in a wet area, such as a bathroom or kitchen.
There are two main types of underlayment for vinyl flooring: foam underlayment and felt underlayment. Foam underlayment is typically thicker and more expensive than felt underlayment, but it also provides better insulation and cushioning. Felt underlayment is less expensive, but it still provides some insulation and cushioning.
To lay underlayment, follow these steps:
- Spread out the underlayment: Lay out the underlayment sheets so that they overlap by at least 6 inches.
- Secure the underlayment: Secure the underlayment to the subfloor using double-sided tape or staples.
- Trim the underlayment: Trim the underlayment around the edges of the room, using a utility knife or scissors.
Once the underlayment is laid, you are ready to start installing the vinyl flooring.
Vapor Barrier: A Necessity for Vinyl Flooring in Moist Areas
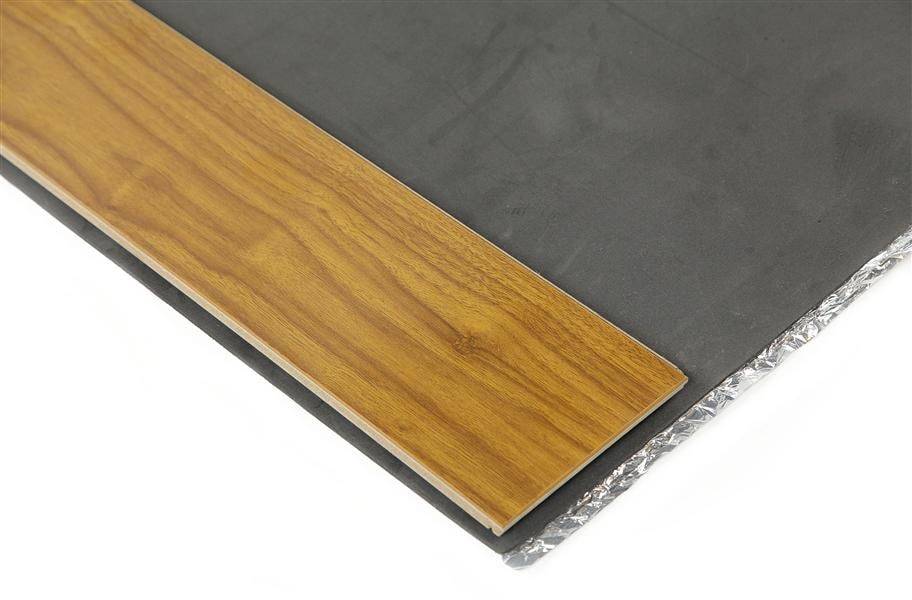
Vapor barriers are an essential part of vinyl flooring installation, especially in areas with high humidity or moisture, such as basements or crawlspaces. They act as a protective layer between the subfloor and the vinyl flooring, preventing moisture from rising from the ground and damaging the flooring.
Installing a vapor barrier is crucial for several reasons:
- Prevents Mold Growth: Moisture can lead to mold growth, which can not only damage the vinyl flooring but also pose health risks.
- Extends Flooring Life: A vapor barrier helps to keep the subfloor dry, which in turn extends the lifespan of the vinyl flooring.
- Protects Against Dampness: Vapor barriers create a barrier that prevents moisture from seeping through the subfloor and damaging the vinyl flooring.
- Ensures Structural Integrity: A vapor barrier helps to maintain the structural integrity of the subfloor, preventing it from warping or buckling.
In areas with high moisture
In areas with high moisture, it is recommended to install a 6-mil polyethylene vapor barrier. Here’s how to install it effectively:
- Lay the Vapor Barrier: Spread out the vapor barrier sheets, ensuring they overlap by at least 6 inches to create a continuous layer.
- Tape the Seams: Use duct tape or a heavy-duty vapor barrier tape to seal the seams securely, ensuring no moisture can seep through.
- Secure the Barrier: Secure the edges of the vapor barrier to the walls using double-sided tape or staples to prevent it from shifting or curling.
- Install Underlayment: Once the vapor barrier is securely in place, lay down the underlayment as described in the previous section.
By following these steps, you can effectively protect your vinyl flooring from moisture damage and ensure its long-lasting beauty.
Transition Strips: The Finishing Touch for a Flawless Vinyl Flooring Installation
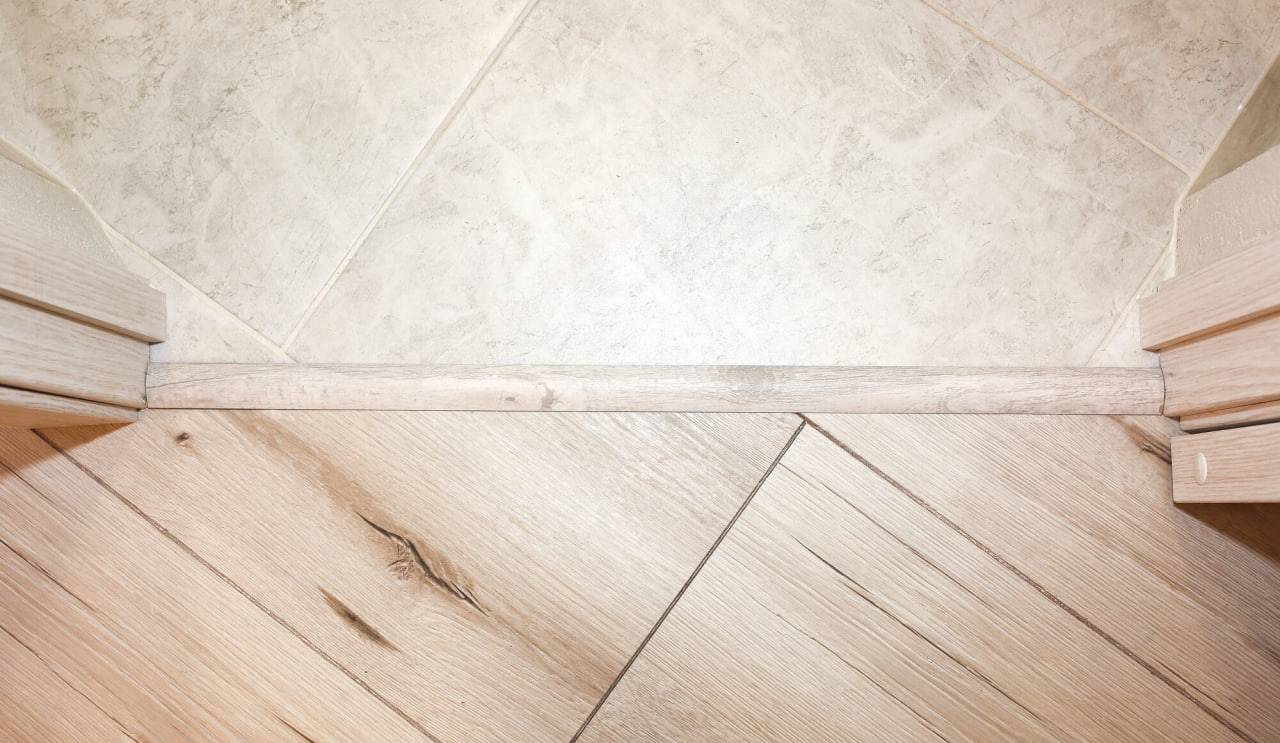
Transition strips are an essential part of any vinyl flooring installation, as they help to create a smooth transition between different flooring types, such as carpet, tile, or hardwood. They also help to cover the gap between the two flooring types and prevent debris from accumulating.
There are two main types of transition strips: metal and vinyl. Metal transition strips are typically more durable and can withstand heavy traffic, while vinyl transition strips are more affordable and can be painted to match the color of the flooring.
To install transition strips, follow these steps:
- Measure and Cut the Transition Strip: Measure the width of the gap between the two flooring types and cut the transition strip to the appropriate length.
- Position the Transition Strip: Carefully position the transition strip over the gap, ensuring it is level and aligned with the two flooring types.
- Secure the Transition Strip: Secure the transition strip to the subfloor using adhesive or screws, ensuring it is firmly in place.
- Trim Excess Material: Trim any excess material from the transition strip using a utility knife or scissors.
- Clean Up: Clean up any debris and ensure the transition strip is free of dust or debris.
By following these steps, you can effectively install transition strips and create a seamless transition between different flooring types, enhancing the overall aesthetic appeal of your vinyl flooring installation.
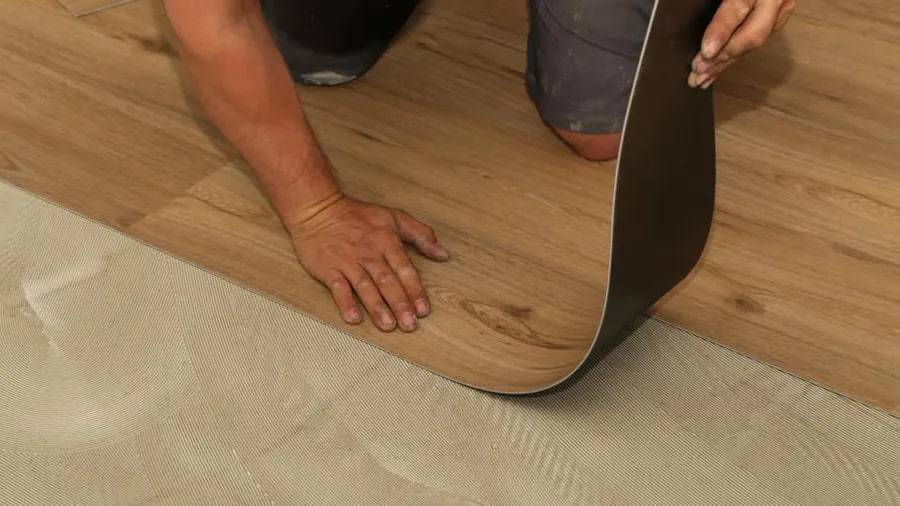
Start Laying the Vinyl Flooring: The Foundation of a Beautiful and Durable Installation
After preparing the subfloor, laying underlayment, and installing transition strips, you are now ready to start laying the vinyl flooring. The way you lay the vinyl flooring will determine the overall look and durability of your flooring installation.
To lay vinyl flooring, follow these steps:
- Start in the Far Corner: Always start laying the vinyl flooring in the farthest corner of the room. This will give you a straight line to work from and will make it easier to align the planks or tiles.
- Measure and Cut the First Plank or Tile: Measure the distance from the wall to the starting point and cut the first plank or tile to length.
- Snap the Plank or Tile into Place: Carefully snap the first plank or tile into place, ensuring it is properly aligned with the starting point.
- Continue Laying the Flooring: Continue laying the remaining planks or tiles, snapping them into place one by one.
- Tighten the Flooring: Use a mallet or tapping block to tighten the planks or tiles and ensure they are properly locked together.
- Trim Around Obstacles: Carefully trim the planks or tiles around any obstacles, such as pipes, vents, or door jambs.
- Work Your Way Around the Room: Continue working your way around the room, laying planks or tiles and trimming them as needed.
- Finishing Touches: Once the flooring is laid, apply a seam sealant to the seams between the planks or tiles to ensure a watertight seal.
- Clean Up: Once the seam sealant is dry, clean up any debris and ensure the flooring is free of dust or debris.
By following these steps, you can effectively lay vinyl flooring and create a beautiful, durable, and long-lasting installation that will enhance the look and feel of your home.
Using a Jig or Seam Roller: Ensuring a Flawless and Professional-Looking Installation
A jig or seam roller is an essential tool for laying vinyl flooring, as it helps to ensure the planks or tiles are properly aligned and sealed. A jig is a device that holds the planks or tiles in place while you snap them together, while a seam roller is a tool that rolls over the seams between the planks or tiles to create a tight seal.
To use a jig or seam roller, follow these steps:
- Position the Jig or Seam Roller: Position the jig or seam roller over the seam between the planks or tiles.
- Apply Pressure: Apply firm pressure to the jig or seam roller to ensure the planks or tiles are properly aligned and sealed.
- Roll Along the Seam: Roll along the seam until the entire seam is smooth and secure.
- Repeat for Each Seam: Repeat the process for each seam between the planks or tiles.
Using a jig or seam roller will help you create a professional-looking installation with tight seams that will not only look great but also help to prevent moisture from seeping through.
Trimming the Vinyl Flooring: A Crucial Step for a Neat and Professional Look
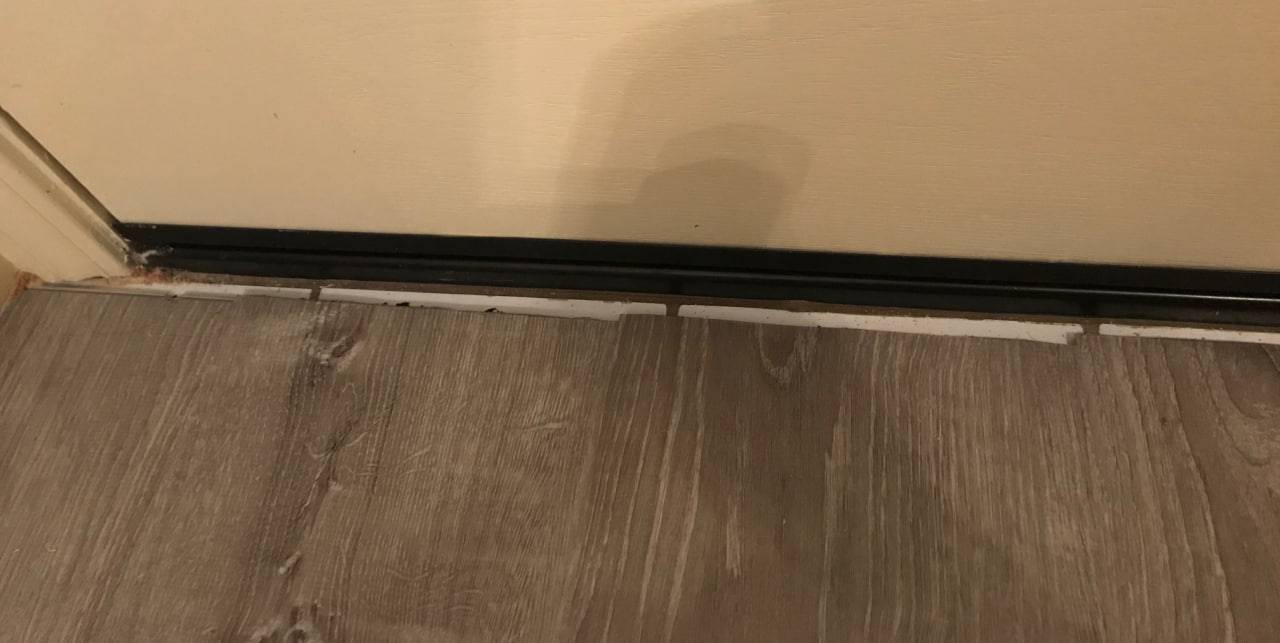
Trim the vinyl flooring to complete the installation and create a neat and professional look. This step involves cutting the vinyl flooring to fit around walls, baseboards, and other obstacles.
Here are the steps to trim the vinyl flooring:
- Measure and Mark: Measure the gap between the wall and the last plank or tile and mark the cut line on the plank or tile.
- Use a Utility Knife or Circular Saw: Use a utility knife or circular saw to cut along the marked line.
- Trim Excess Material: Trim any excess material from the cut edge of the plank or tile.
- Smoothen the Edges: Use sandpaper to smoothen the cut edges of the plank or tile and remove any rough spots.
- Install Baseboards: Once the vinyl flooring is trimmed, install baseboards to cover the gap between the flooring and the wall.
Conquer Vinyl Flooring Installation Like a Pro in 10 Steps with Dex Flooring!
Say goodbye to flooring installation woes and hello to a stunning, durable vinyl floor you can be proud of. Dex Flooring is here to empower you every step of the way with our comprehensive guide and high-quality vinyl flooring products.
Here’s a sneak peek at what you’ll master:
- Prepping the Perfect Canvas: Ensure a smooth, level subfloor for flawless vinyl adherence.
- Cushioning Comfort with Underlayment: Add an extra layer of comfort and noise reduction for a spa-like feel underfoot.
- Moisture Shield: The Silent Guardian: Protect your investment from moisture woes with a trusty vapor barrier, especially in damp areas.
- Seamless Transitions: Bridge the gap between vinyl and other flooring types like a pro using transition strips.
- Laying the Foundation: Start in a far corner and strategically snap planks or tiles into place, creating a beautiful, unified flow.
- Jig It Up! Ensure flawless alignment and tight seams with the help of a jig or seam roller – your secret weapon for a polished look.
- Precise Trimming: Conquer those corners and obstacles with expert cuts using a utility knife or circular saw.
- Finishing Touches: Apply seam sealant for extra protection and add baseboards for a complete, professional look.
- Sit Back and Admire: Revel in your accomplishment and enjoy your new Dex Flooring masterpiece!
Bonus Tip: Dex Flooring offers a wide variety of vinyl flooring styles and colors to suit your taste and budget. Browse our collection and find the perfect match for your dream home!
Visit Dex Flooring today and unlock your inner flooring pro! We have everything you need to conquer your vinyl flooring installation project with confidence and style.
FAQs
Transforming your space with stunning vinyl flooring is an exciting project, but questions might arise along the way. Dex Flooring is here to help! We’ve compiled some frequently asked questions to guide you through your vinyl flooring installation journey:
Q: What tools do I need for vinyl flooring installation?
A: You’ll be well-equipped with a utility knife, tape measure, mallet, and tapping block. Depending on your chosen vinyl type, a scoring tool or laminate cutter might come in handy. Consider a jigsaw for intricate cuts around obstacles.
Q: How do I prepare the subfloor for vinyl flooring?
A: Ensure a smooth, clean, and level surface. Patch any cracks or holes, and remove old flooring and adhesive residue. Sand down uneven areas and thoroughly clean the subfloor to remove dust and debris.
Q: Do I need underlayment for vinyl flooring?
A: Underlayment is highly recommended! It provides cushioning for comfort, noise reduction, and insulation. Choose the appropriate underlayment type based on your needs and vinyl flooring specifications.
Q: Can I install vinyl flooring in a bathroom or kitchen?
A: Absolutely! Dex Flooring offers waterproof vinyl flooring options perfect for moisture-prone areas. Remember to install a vapor barrier in basements or crawl spaces to prevent moisture damage.
Q: How do I cut vinyl flooring planks or tiles?
A: Score the plank or tile with a utility knife along the cut line, then snap it cleanly. For intricate cuts, a laminate cutter or jigsaw can be helpful. Always wear safety glasses and handle cutting tools with caution.
Q: How do I clean and maintain vinyl flooring?
A: Regular sweeping and mopping with a gentle cleaning solution will keep your vinyl floor sparkling. Avoid harsh chemicals, abrasive scrubbers, and excessive water.
Q: What warranty does Dex Flooring vinyl flooring offer?
A: We stand behind our quality! Dex Flooring vinyl flooring comes with various warranty options for residential and commercial use, ensuring your investment is protected.