
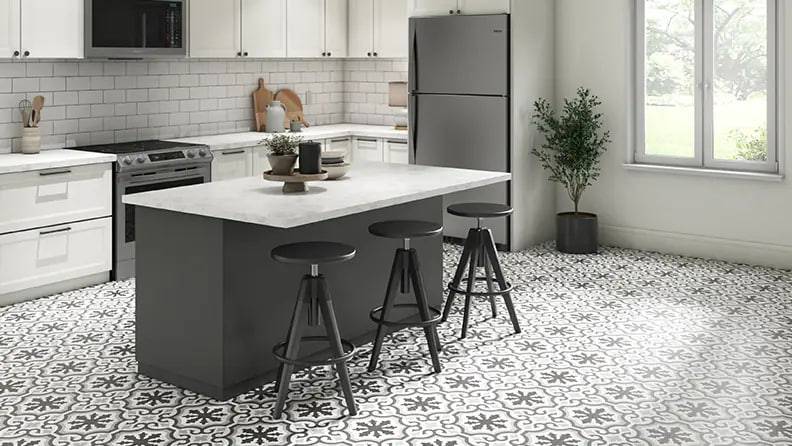
Tired of complicated flooring installations? Peel-and-stick vinyl flooring is your answer. Forget messy glues and complicated tools – this flooring option offers a breeze of fresh air compared to laminate, especially with a well-prepped subfloor. But before you dive in, keep in mind: a smooth, level, and imperfection-free subfloor is key for the pre-applied adhesive to work its magic.
Ready to transform your floors with beautiful, easy-to-install peel-and-stick vinyl tiles? Dex Flooring has a fantastic selection of high-quality options to suit any style and budget.
Browse our extensive online catalog or visit your nearest Dex Flooring location to speak with a flooring expert. We’re here to help you find the perfect peel-and-stick vinyl tiles for your dream floor!
Call Us Now: +61 483 224 831
Where to Install Peel-and-Stick Tiles?
Not all locations are created equal for peel-and-stick vinyl. Unlike some flooring options, it’s sensitive to moisture. Installing below-grade (basements) is generally a no-go, and might void your warranty. However, some manufacturers allow installation on below-grade concrete subfloors if they meet specific moisture requirements.
To be sure, check the manufacturer’s specifications and consider a moisture test to confirm suitable moisture levels.Radiant heating systems are also not recommended with peel-and-stick vinyl tiles.
Preparing the Subfloor
Peel-and-stick vinyl can work wonders on various surfaces, including existing vinyl, concrete, and even old tile! For tile installations, you have two options:
- Filling the Gaps: Fill grout lines with floor-leveling compound to create a smooth canvas for the vinyl tiles.
- Underlayment Alternative: Cover the tile with untreated plywood or oriented strand board (OSB) with a minimum thickness of 1/4 inch (as recommended by Armstrong) to create a level surface.
If you’re starting with a bare wood subfloor, ensure it’s flat and smooth according to the vinyl manufacturer’s specifications. Often, installing new underlayment designed for vinyl flooring is quicker and easier than fixing an uneven subfloor. These underlayments can be conveniently stapled down.
Cleanliness is Key!
No matter the surface (existing floor, subfloor, or underlayment), a spotless installation area is crucial. Remove any oil, soap, wax, or silicone residue that might prevent the tiles from adhering properly. Don’t forget to eliminate any leftover adhesive from previously removed flooring.
Peel-and-Stick Vinyl Tile Installation Guide
Tools Needed for Peel-and-Stick Vinyl Flooring Installation
| Tool | Description |
| Tape Measure | Measures room dimensions and marks tile placement |
| Chalk Line | Creates straight lines for laying the first row of tiles |
| Framing Square | Ensures perfect 90-degree cuts for tiles around corners |
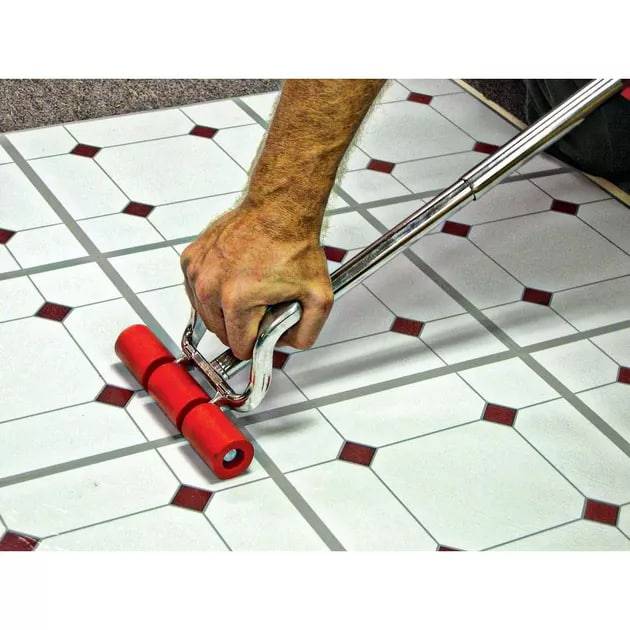
| Floor Roller | Applies pressure to secure tiles and ensure a strong bond |
| Utility Knife | Cuts tiles to size for a precise fit |
| Straightedge | Guides straight cuts with the utility knife |
| Cloth | Cleans the subfloor before installation |
Get ready to transform your floors with peel-and-stick vinyl tiles! Here’s a step-by-step guide to ensure a smooth and successful installation:
Step 1: Create Layout Lines

Find the midpoints of two opposing walls using a tape measure. Snap a chalk line between these points. Locate the midpoints of the perpendicular walls and snap another chalk line that intersects the first one. Use a framing square to make sure these lines are perpendicular to each other. If not, adjust one or the other until they are square.
Step 2: Test-Fit the Tiles
Starting at the cross in the center, dry-lay a full row of tiles (not sticking them down) along both chalk lines, going all the way to the walls. Check the width of the tiles that will meet the walls: if they are less than half of a full tile, it might look better to adjust the row one way or the other so you end up with wider tiles at each end. If you make adjustments, snap new chalk lines, as needed, to create new layout lines. Note: Plan for a 1/4-inch expansion gap at all walls; you can cover these gaps later with baseboard trim and/or shoe molding.
Step 3: Lay the First Four Tiles
Begin laying tiles at the cross, or intersection, of the chalk lines. Peel the protective coating from the back of each tile and lay it with one corner on the center of the cross, with two sides of the tile on the chalk lines. Position the tile and then drop it into place and push down so the adhesive makes good contact with the subfloor.
Step 4: Work in Sections
Lay the tiles in sections of about 50 square feet. After completing each section, roll the tiles with a floor roller to seat them. It’s generally best to extend the tiles in one section all the way to the wall before starting on another section.
Step 5: Finish Laying All the Full Tiles
Lay tiles out to the perimeter of the room in all directions before you do any cutting to install partial pieces. That way, you’ll be able to shift your activity to cutting all the tiles at once rather than doing it piecemeal.
Step 6: Cut the Edge Tiles
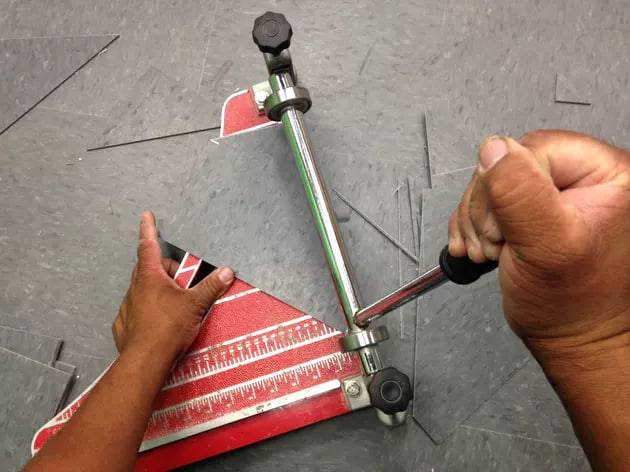
Use a sharp utility knife and a straightedge to cut tiles to fit along the room’s edges. Use this easy technique to measure tiles along straight walls:
- Place the tile to be cut faceup on the installed tile closest to the wall so it completely covers the installed tile.
- Place a second tile on top of the upper tile (the one you will cut), push it against the wall, then back it off 1/4 inch to create an expansion gap.
- Draw a line along the room-side edge of the top tile, marking a cutting line onto the second tile.
- Remove the two loose tiles, and cut the marked tile along the line; the resulting piece will fit the space exactly, leaving a 1/4-inch expansion gap at the wall.
Of course, you can also make accurate cuts by measuring the gap with a tape measure and transferring the measurements onto the tile to be cut. Always use a straightedge when cutting to ensure a straight cut.
Step 7: Roll the Entire Floor
When you’ve finished installing the tiles, wipe off any stray adhesive with a damp cloth. Roll the entire floor one last time to bond the tiles to the floor. While you can walk on the floor 24 hours after the final rolling, it’s best to wait for 48 hours before installing any baseboard trim or moving in your furniture.
Conclusion
Peel-and-stick vinyl flooring offers a user-friendly and stylish way to update your floors. With careful planning and this step-by-step guide, you can achieve professional-looking results without needing extensive experience or complicated tools. So, unleash your creativity, choose your favorite peel-and-stick vinyl tiles, and get ready to enjoy a beautiful and functional new floor!
Trend FAQs
Are peel-and-stick vinyl tiles durable?
Peel-and-stick vinyl tiles have come a long way in terms of durability. While not as tough as some other flooring options, they can last for several years with proper care and maintenance. They are a great choice for low to medium traffic areas.
What are some of the latest trends in peel-and-stick vinyl flooring?
- Wood-look planks: These realistic wood-look tiles offer the warmth and beauty of hardwood floors at a fraction of the cost and installation time.
- Large format tiles: Bigger tiles create a more seamless and modern look, while minimizing grout lines for easier cleaning.
- Bold patterns and colors: Don’t be afraid to experiment with geometric patterns or pops of color to add personality to your space.
Are peel-and-stick vinyl tiles easy to maintain?
Absolutely! Regular sweeping or mopping with a gentle cleaning solution will keep your peel-and-stick vinyl floor looking its best.
Can peel-and-stick vinyl tiles be installed over existing flooring?
In many cases, yes! Peel-and-stick vinyl tiles can be installed over various surfaces like laminate, vinyl, and even concrete, as long as the subfloor is properly prepared (clean, flat, and free of imperfections). Always check the manufacturer’s recommendations for specific applications.