
Tired of noisy steps echoing through your house? Want to add a touch of comfort and style to your staircase? Carpeting your stairs is an affordable DIY project that can be completed in a short afternoon!
Dex Flooring can provide all the materials and expert advice you need to get the job done right. Keep reading to learn the steps involved in gluing carpet to your stairs, and visit Dex Flooring today to find the perfect carpet for your project!
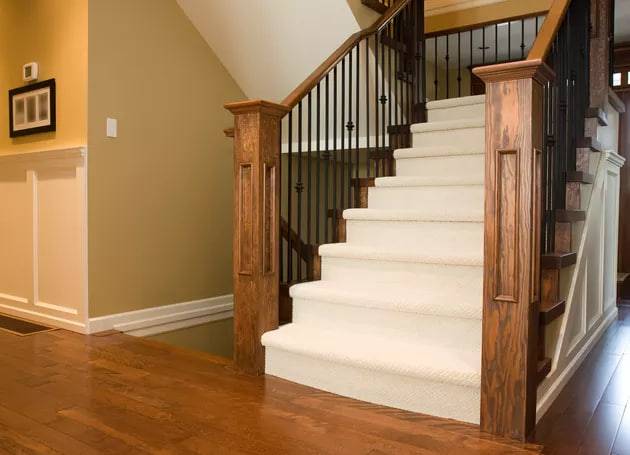
Step Up Your Safety and Style with Carpeted Stairs
Considering an upgrade for your staircase? Carpeting offers more than just a new look – it adds essential safety features and enhances your home’s comfort. Here’s how:
- Safer Steps: Carpeted stairs provide better traction, reducing the risk of slips and falls, especially compared to hard surfaces. This is crucial for homes with young children or elderly residents.
- Quieter Living: Carpet acts as a natural sound absorber, muffling noise that travels between floors. This can be a game-changer, especially in multi-story homes, by minimizing the sounds of footsteps, dropped objects, or loud appliances.
Get Grippy with DIY Carpeted Stairs!
Giving your stairs a makeover with carpet? Here’s a step-by-step guide to gluing it down securely:
Step 1: Measure and Cut with Confidence
- Precision is key: Measure your stairs meticulously. You’ll need separate pieces for the treads (flat top surface) and risers (vertical part) if you choose to carpet both. Account for overhang at the nose (front edge) of the tread for a finished look.
- Sharp cuts, clean results: Use sharp carpet shears to cut your carpet pieces. Label them for each step to avoid confusion later.
- Dry fit for peace of mind: Lay the carpet pieces on the stairs to ensure a perfect fit. Make any adjustments before gluing to prevent wasted material and frustration.
Step 2: Glue Down the Foundation (Optional)
- Extra comfort underfoot: Consider using carpet underlayment for added cushioning and noise reduction. If using, spread the underlayment on the stairs and secure it with carpet tacks along the edges.
Step 3: Spreading the Sticky Stuff
- Choose the right adhesive: Select a carpet glue specifically designed for stair applications. It should offer strong, long-lasting hold.
- Trowel like a pro: Using a notched trowel, spread the glue evenly on a manageable section of the stair tread (or riser, if carpeting). Work in sections to avoid the glue drying prematurely.
Step 4: Lay and Press with Precision
- Careful placement: Carefully lay the corresponding carpet piece onto the glued section, aligning the edges perfectly.
- Banish the bubbles: Use a broom or carpet roller to firmly press the carpet down, ensuring good contact with the glue and eliminating any air bubbles. Work from the center outwards.
Step 5: Repeat and Relax
- One step at a time: Repeat steps 3 and 4 for each stair tread (and riser, if applicable). Work your way up systematically.
- Let it set: Once complete, allow the glue to dry completely according to the manufacturer’s instructions.
Bonus Tip: For a truly professional finish, use a carpet kicker tool to stretch and secure the carpet edges on the underside of the stairs.
Carpet Gluing Alternatives
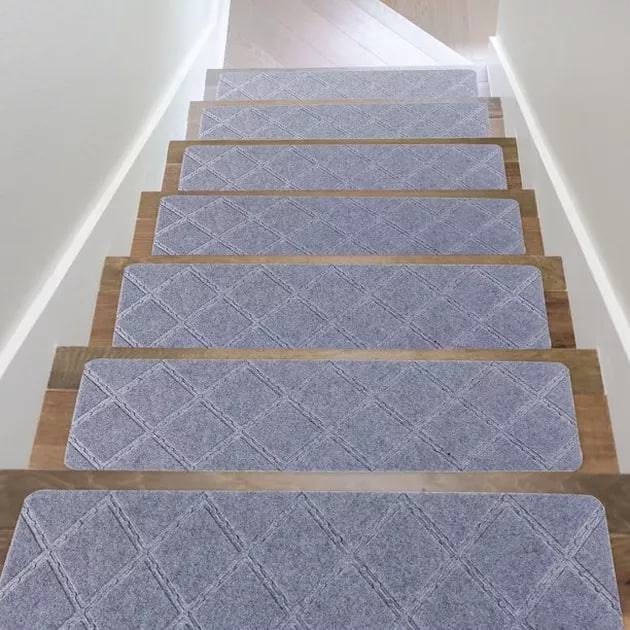
Not a fan of measuring, cutting, and gluing carpet to your stairs? No worries! Here are some fantastic alternatives that offer the same benefits of traditional carpet, but with a simpler installation process:
1. Stick-on Carpet Tiles: Peel, Stick, and Step in Style!
- Design Freedom: Unleash your creativity with a wide variety of colors, patterns, and textures to choose from.
- Effortless Installation: Simply peel off the backing and adhere the tile to the step. No messy glue or complicated tools required! (Just be sure to plan your layout beforehand, as the adhesive is strong).
- Express Makeover: Transform your stairs in no time! Cut the tiles to size with a utility knife for a perfect fit, and enjoy a safer, quieter staircase by lunchtime.
2. Runner Rugs: Classic Charm, Easy Elegance
- Soft Touch & Sound Dampening: Runner rugs add a layer of plush comfort underfoot while absorbing noise – perfect for reducing foot traffic sounds between floors.
- Pre-Sized Convenience: Skip the measuring and cutting! Runner rugs come in standard sizes specifically designed to fit most staircases.
- Secured Style: Stair rods add a touch of sophistication and ensure your runner rug stays securely in place, even with high foot traffic.
So there you have it! With these glue-free options, you can still enjoy the comfort, safety, and stylish upgrade that carpeted stairs bring – all without the hassle of a traditional installation.
Conclusion
With these DIY options in mind, there’s no reason to settle for noisy, slippery stairs. Whether you choose the convenience of stick-on tiles or the classic elegance of a runner rug, you can easily add warmth, safety, and a touch of personality to your staircase. So grab your favorite option and get ready to step up your home’s style and comfort!
FAQs
Q: What’s hot in stair runner trends?
A: Bold geometric patterns, natural textures like sisal, and two-toned runners that add visual interest are all popular choices.
Q: Are stick-on carpet tiles durable?
A: While not quite as permanent as glued carpet, stick-on tiles have come a long way in terms of quality. Look for tiles with a strong adhesive backing and choose a material suited for high-traffic areas.
Q: Can I use a runner rug on carpeted stairs?
A: Yes, but use caution! Layering carpets can create a tripping hazard. Opt for a thin runner rug with a non-slip backing and ensure it lays flat without bunching.
Q: How do I clean stick-on carpet tiles?
A: Most tiles are easy to spot clean with a damp cloth and mild detergent. For a deeper clean, some manufacturers recommend vacuuming with the upholstery attachment.
Q: Can I replace individual stick-on tiles if damaged?
A: Absolutely! That’s one of the beauties of this option. Simply remove the damaged tile and replace it with a new one.