
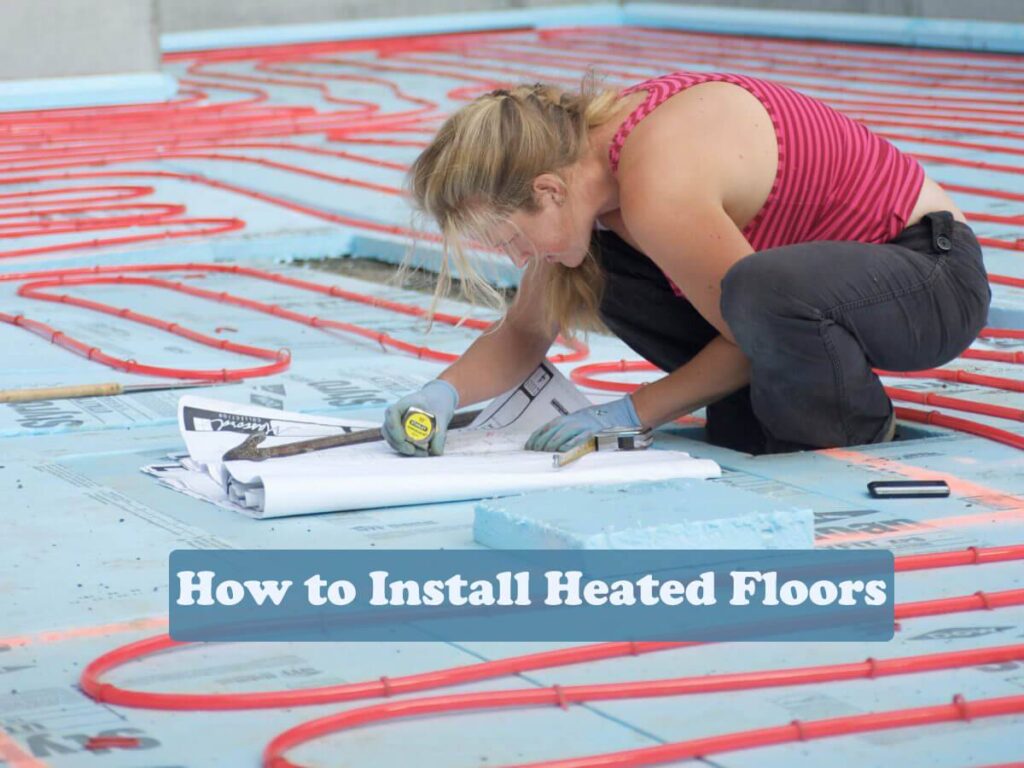
Dream of toasty toes all winter long? Banish the chills with heated floors! This luxurious upgrade adds an invisible layer of warmth beneath your flooring, controlled by a simple thermostat.
Unlike traditional heating, which creates hot and cold zones, radiant floor heating warms the entire room evenly. No more blasting the heat just to warm up those icy spots! Plus, it operates silently and dust-free.
While installing heated floors is a DIY project, it’s best suited for those with some electrical experience. The timeframe depends on your skill level and the existing conditions. Pre-made heating mats are quicker to install, but loose cable systems offer better efficiency as the heat directly warms your final flooring.
Existing flooring adds another layer of complexity. Ripping up old floors takes significantly longer than working with an exposed subfloor. Wiring methods can also vary. This guide focuses on systems that connect directly to a switch, rather than those with flat ribbon leads.
Planning Makes Perfect: Sketching and Flooring Selection

Before diving in, take some time to plan your heated floor oasis. Here’s what you need to consider:
Sketching Your Layout:
- Grab a pencil! Sketch the room where you’ll be installing the heated floors.
- Smart space saving: No need for heating mats or pipes under bulky items like closets, appliances, and vanities.
- Heating zones: Aim for 50% coverage in bathrooms and 60% in kitchens and living areas.
- Wiring your warmth: Sketch the planned wiring path on your floor plan. Mark the thermostat location and any existing electrical features.
Thermostat Placement:
- Interior walls are ideal: Easier drilling through the floor plate for access.
- Closer is better: Locate the thermostat near its power source to avoid efficiency loss from long wires.
Choosing the Perfect Floor:
- Heat conductor champions: Ceramic tile, stone, parquet, and laminate conduct heat best, maximizing system efficiency.
- Consider carpet alternatives: Carpet tiles are thinner than traditional carpets, allowing for better heat distribution.
- Vinyl’s the heat-seeker: Vinyl boasts a low R-value (heat resistance), making it a good choice, but limit the temperature to 85°F.
What You Need
Planning and Layout:
- Pencil
- Measuring tape
Electrical:
- Junction box
- 12/2 cable (electrical cable type)
- Ohmmeter (electrical tester)
Heated Floor System:
- Radiant heat flooring mats
Floor Installation (depending on your chosen flooring):
- Double-faced tape
- Chisel (for modifying subfloor if needed)
- Hot glue gun and sticks (optional, for securing mats)
- 3/8-inch notched trowel (for applying thinset)
- Thinset mortar
- Tile (or your desired flooring material)
- Grout
- Screwdriver
How to Install Heated Floors
Step 1: Prepare the Electrical Supply
This step involves setting up the electrical wiring for your heated floors. It’s crucial to ensure safety, so consult a licensed electrician if you’re not comfortable working with electrical systems.
Here’s a general overview:
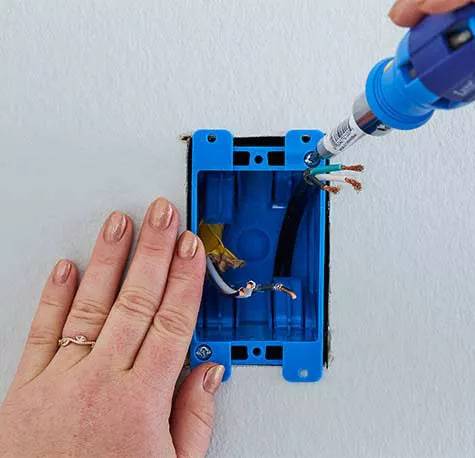
- Mark the Thermostat Location: Decide where you want your thermostat mounted on the wall (ideally 60 inches high).
- Install the Junction Box: Use the appropriate box type (flanged for new construction, retrofit for existing walls).
- Plan the Wiring Path: The 12/2 cable will run from the junction box through the subfloor and basement (if applicable) up the wall to the thermostat location. Do not connect the circuit to the power source yet.
- Circuit Considerations:
- Check the existing circuit’s amperage to see if it can handle the additional load from the heated floors. Each square foot of heating mat uses about 0.1 amp.
- Consider hiring an electrician to ensure proper circuit installation or extension if needed.
- Component Compatibility: Ensure all electrical components in the system (dimmers, timers, etc.) are rated for the required amperage.
Remember, safety first! If electrical work makes you uncomfortable, consult a licensed electrician.
Step 2: Verify Heating Mat Integrity (Safety Check)
Before installing the heating mat, it’s crucial to ensure it’s functioning properly. Here’s how to perform a quick safety check:
- Unfold the Heating Mat: Carefully lay out the mat on a flat surface.
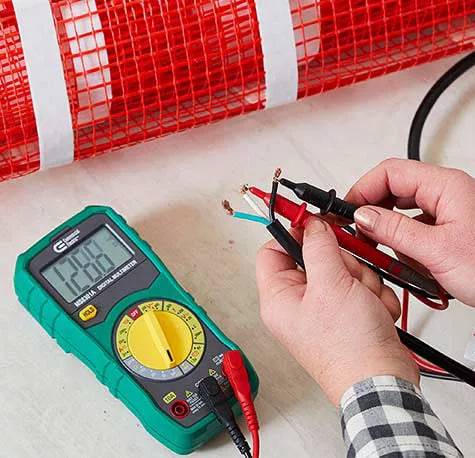
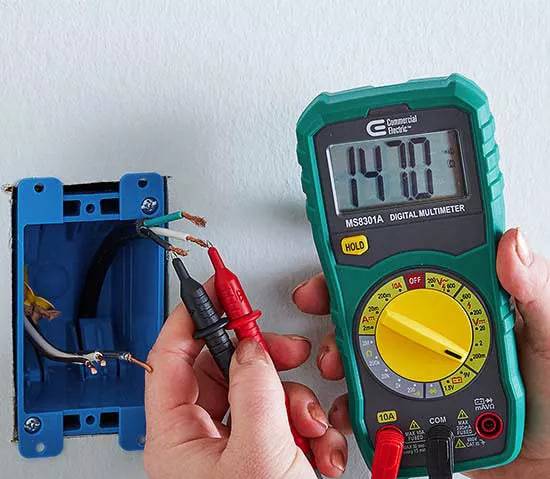
- Test the Resistance: You’ll need an ohmmeter, a tool that measures electrical resistance.
- Ohmmeter in Action: Touch one probe of the ohmmeter to one end of the heating cable on the mat. Then, touch the other probe to the opposite end of the cable.
- Interpreting the Reading: The displayed value should be within 10% of the resistance rating listed on the mat’s UL label (a safety certification tag). This confirms the cable is intact and hasn’t been damaged.
- Record the Reading: Write down the measured resistance for your reference. You’ll compare it again after installation to ensure the mat wasn’t accidentally nicked during the process.
Step 3: Secure the Heating Mat
Now that you’ve confirmed the mat’s functionality, it’s time to prep the subfloor and secure the heating mat in place.
- Prep the Subfloor: Thoroughly clean the subfloor, removing any debris like dirt, dust, or loose objects. Tighten any protruding screws or nails that could puncture the mat.
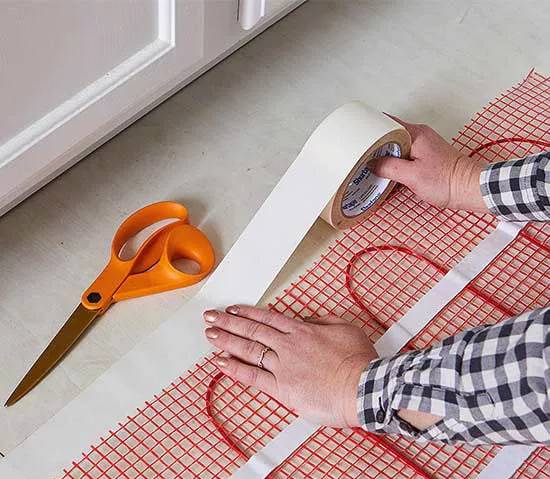
- Plan the Layout: Unroll the heating mat, ensuring it maintains a minimum 3-inch distance from walls and fixtures throughout the room. This prevents overheating near these areas.
- Secure the Mat: Once you’ve finalized the layout, use double-faced tape to firmly fasten the mat to the subfloor.
Important Notes:
- In bathrooms, you can install the mat under the toilet, but it must be at least 3 inches away from the toilet ring.
- The mat can also run beneath the vanity’s kick plate.
- Never overlap or cut the heating mats! If the wire is damaged, the entire mat needs replacement.
Step 4: Managing the Power Lead
This step addresses how to handle the power lead from the heating mat, depending on its thickness:
Thin Power Lead:
- If the power lead is flat and similar in thickness to the heating mat itself, you typically don’t need to create a channel. These leads can be embedded directly within the thinset mortar used to secure the tiles or flooring material.
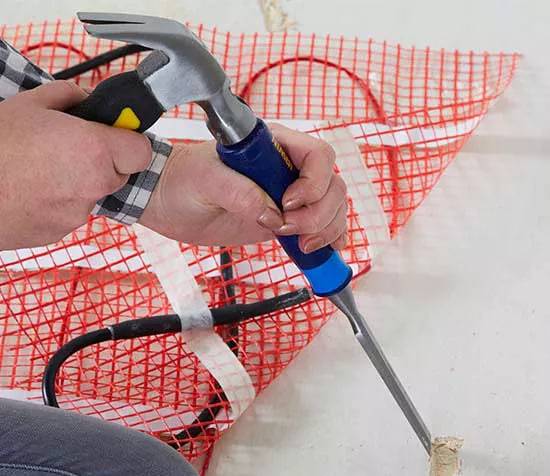
Thick Power Lead:
- If the power lead is thicker than the heating mat (usually a round cable), there are two options:
- Recommended: Leave the lead on top of the subfloor. Ensure it’s carefully positioned and secured with heat-resistant tape to prevent movement during floor installation. The thinset mortar used for laying the final floor covering will then fully cover and protect the lead.
- Not Recommended (Use with Caution): For experienced DIYers only! If absolutely necessary, you can create a channel in the subfloor material (wood only) using a wood chisel to recess the lead. Avoid this method with cement backer board due to the risk of damaging the power lead.
Step 5 : Secure the Power Lead
This step is optional and only applicable if you have a thick power cable and opted to leave it on the subfloor (refer to Step 4).
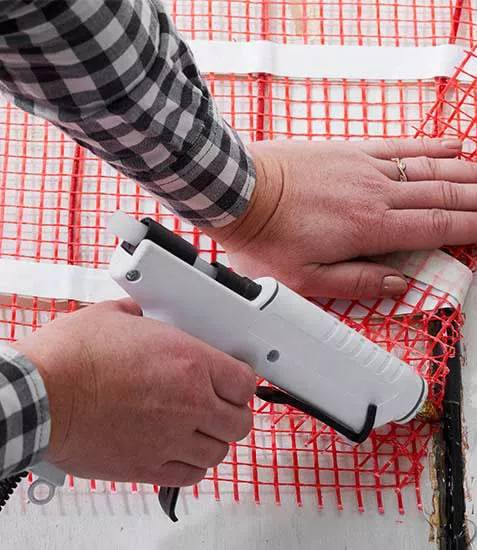
Securing with Heat-Resistant Tape (Recommended):
The recommended approach is to use heat-resistant tape specifically designed for underfloor heating applications. Apply the tape along the entire length of the power cable, firmly pressing it onto the subfloor. This method ensures the cable is secure and protected during floor installation.
Note: Avoid using regular electrical tape, duct tape, or other non-heat-resistant tapes, as they may degrade over time due to the heat exposure.
Alternative: Thinset Mortar (for Experienced DIYers Only)
For experienced DIYers only, as an alternative to tape, you can carefully press the power cable into the thinset mortar that will be used to install the final floor covering. However, ensure complete coverage of the cable by the mortar to guarantee its protection.
Step 6: Laying the Floor Covering
Now you’re ready to apply the thinset mortar and install your chosen flooring material!
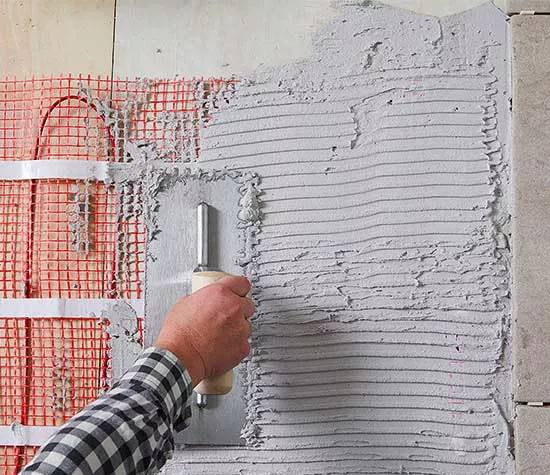
Preparing the Thinset:
- Using the flat side of a 3/8-inch notched trowel, spread a thin layer of thinset mortar over a manageable section of the subfloor where the heating mat is located.
Applying the Thinset:
- Flip the trowel and use the notched edge to comb the thinset mortar across the area. Aim for a consistent depth of approximately 1/4 inch. Be gentle while combing to avoid snagging or damaging the heating mat.
Tiling Tips:
- Work in sections, applying thinset mortar to a manageable area before laying your tiles.
- Carefully place the tiles onto the freshly applied thinset, ensuring proper spacing and alignment. Utilize tile spacers if needed.
Cleanliness and Repetition:
- Maintain a clean work area. Avoid cleaning your trowel by hitting it against the heating mat, as this could damage it.
- Repeat steps 3-5 until the entire floor is covered with your chosen flooring material.
Step 7: Recheck Mat’s Resistance
Once you’ve finished laying your floor covering, it’s crucial to perform a final check on the heating mat to ensure it wasn’t damaged during installation.
Retesting with Ohmmeter:
- Grab your ohmmeter again.
- Following the same method from Step 2, touch the probes to opposite ends of the heating cable on the mat.
- Interpreting the Reading: The displayed value should be within 10% of the initial resistance reading you took in Step 2. This confirms the heating element hasn’t been compromised during tiling.
- Cautionary Readings: If the ohm reading drops to 0 (zero), it indicates a short circuit, and the heating element is damaged. If the reading jumps to infinity, it signifies an open circuit, also signifying damage. In either case, the entire heating mat will need to be replaced.
Safety First! If you suspect the heating mat is damaged, do not connect it to the power source. Consult a qualified electrician for further assistance.
Step 8: Connecting the Thermostat
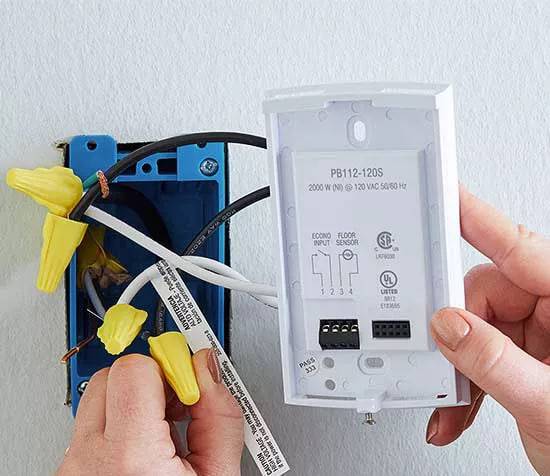
Important Note: This step involves electrical wiring. If you’re not comfortable working with electrical systems, consult a licensed electrician to ensure safe and proper installation of the thermostat.
Here’s a general overview for informational purposes only:
- Refer to Thermostat Manual: The specific wiring instructions will vary depending on your thermostat model. Always refer to the manufacturer’s instructions provided with your thermostat for detailed and accurate connection guidance.
- Sensor Wires: Using a jeweler’s screwdriver (small precision screwdriver), carefully connect the two sensor wires coming from the heating mat to the designated screw terminals on the back of the thermostat control unit.
- Grounding: Connect the ground wire from the heating mat’s power lead to the designated house ground terminal on the thermostat. This ensures proper grounding of the system.
- Remaining Connections: Following the manufacturer’s instructions meticulously, complete the remaining wiring connections for the thermostat, such as power supply and any additional controls (e.g., timer, dimmer).
Safety First!
- Double-check all connections to ensure they are secure and match the manufacturer’s instructions.
- Do not connect the thermostat to the power source yet!
Step 9: Completing the Installation (Attach Faceplate)
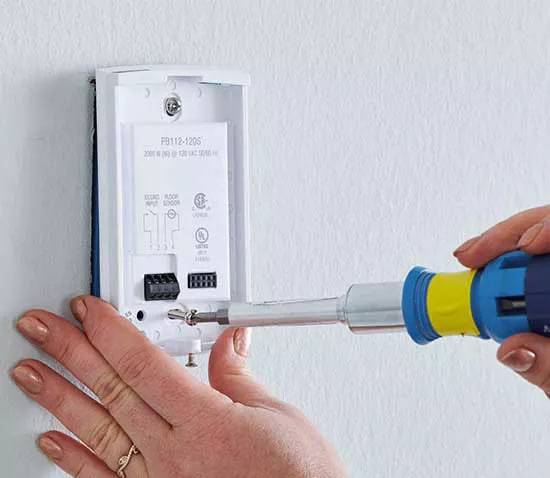
Important Note: This step involves electrical connections and turning on the power. If you’re not comfortable with electrical work, consult a licensed electrician to ensure safe completion of these final steps.
- Final Touches: Once the electrician confirms the wiring is safe and correct, you can attach the decorative faceplate to the thermostat following the manufacturer’s instructions.
- Power Up (Electrician Required): A licensed electrician should then connect the thermostat to the power source or, if necessary, install a new circuit breaker in your home’s electrical panel to accommodate the heated floor system.
- User Controls: After the electrician verifies everything is functioning safely, you can finally power on the system and enjoy your warm floors! Refer to the thermostat’s manual for setting the desired temperature and any timer functionalities.