
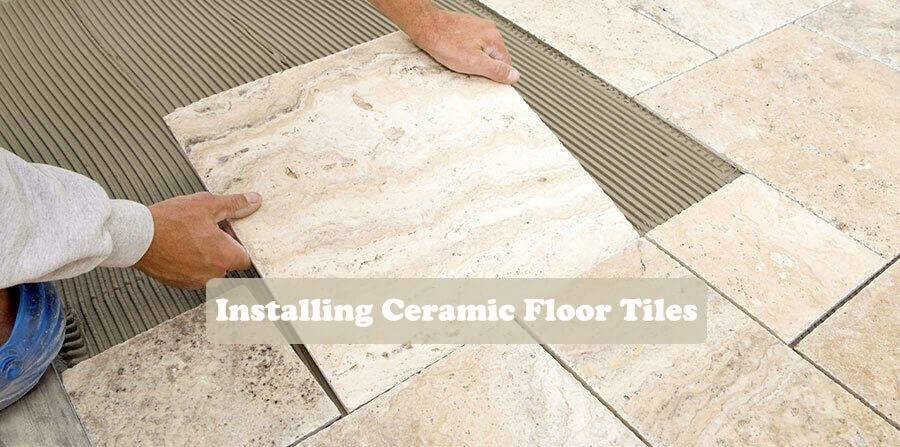
While the timeless elegance of ceramic tile adds charm to any space, its installation demands meticulous planning and execution. This comprehensive guide empowers you, whether a seasoned installer or a curious beginner, to navigate the process with confidence.
From crafting a solid foundation to mastering the final touches, we’ll unveil the secrets to installing ceramic floor tiles that not only elevate your space but stand the test of time. So, ditch the rush and embrace the journey of creating a floor that speaks volumes about your dedication and skill.
Step 1: Assessing and Prepping the Floor
Before embarking on your ceramic tile adventure, it’s crucial to ensure a strong and stable foundation. Imagine a beautiful tapestry; its vibrancy depends greatly on the quality of the underlying canvas. Similarly, the longevity and aesthetics of your tile installation rely heavily on meticulous subfloor preparation.
Inspecting for Strength:
- The Bounce Test: Channel your inner child! Carefully jump on the subfloor. Any noticeable flexing indicates potential problems. Remember, a sturdy subfloor is paramount, as any movement can lead to cracked tiles and failing grout.
- Thickness Matters: As a general rule, the subfloor should be at least 1 1/8 inches thick to prevent flexing.
Choosing the Right Base:
- Concrete: This is the ideal foundation for tile installation due to its inherent strength and stability.
- Wood: While suitable, it’s crucial to ensure the wood subfloor is firm and doesn’t exhibit any movement.
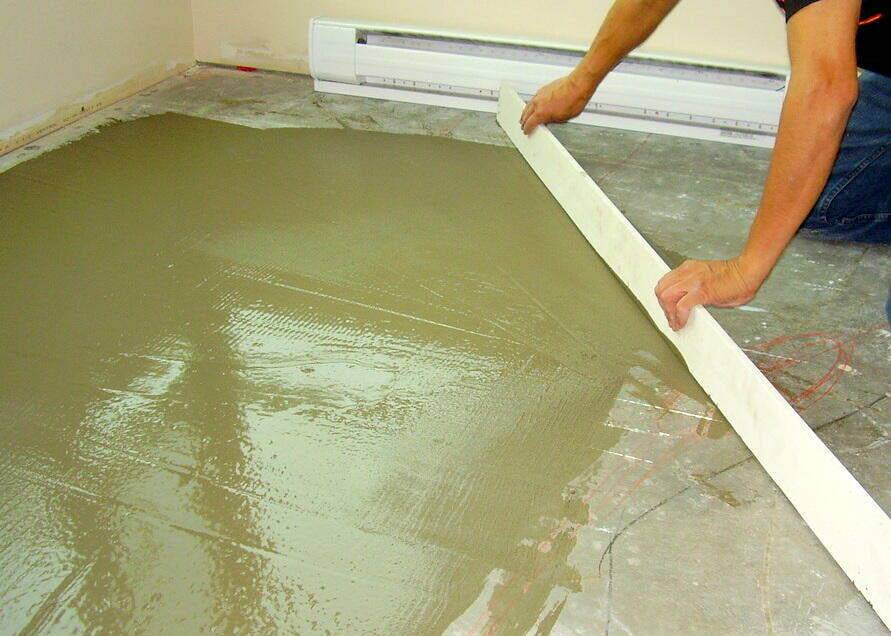
Preparing the Surface:
Once you’ve confirmed the subfloor’s sturdiness, meticulously check for unevenness or protrusions. Remember, even minor imperfections can translate into an uneven and ultimately, unsatisfactory final product. Aim for a smooth and level surface, ready to receive your beautiful ceramic tiles.
Step 2: Measurement and Material Estimation
Before diving into the installation, meticulous planning is essential. This step ensures a smooth and visually balanced final product.
Finding the Center Point:
- Identify the Starting Point: Locate the most prominent wall in the room, often the longest or one with the least interruptions (doors, windows). This will serve as your baseline.
- Measure from the Sides: Measure the distance from the chosen wall to the opposing wall on both sides. This will help establish the center point of the floor.
Pro Tip for Non-Square Rooms: If the room isn’t perfectly square, identifying the center might be trickier. In such cases, prioritize the chosen baseline wall to ensure parallel lines and a symmetrical appearance throughout the installation.
Estimating Tile Needs:
- Calculate Square Footage: Multiply the length and width of the room to determine the total surface area in square feet.
- Factor in Waste: Add 5% to the total area to account for potential cuts, breakage, and unforeseen waste during installation. This buffer ensures you have enough tiles to complete the project without running short.
Example:
Consider a room measuring 10 ft. x 12 ft.
- Surface Area: 10 ft. x 12 ft. = 120 sq. ft.
- Waste Allowance: 120 sq. ft. x 5% = 6 sq. ft.
- Total Tiles Required: 120 sq. ft. + 6 sq. ft. = 126 sq. ft.
Therefore, you’ll need to purchase enough ceramic tile to cover 126 square feet. Remember, this is just an estimate, and it’s always better to have a slight surplus to avoid delays or complications during installation.
Step 3: Dry-Fitting and Layout Considerations
With the foundation prepped and material estimations in hand, it’s time to meticulously plan the visual masterpiece you’re about to create. This step, often overlooked, is crucial for achieving a balanced and aesthetically pleasing final product.
Dry-Fitting for Perfection:
Before permanently adhering the tiles, embark on a dry-fitting exercise. This involves arranging the tiles on the prepared subfloor without using any mortar. This step allows you to:
- Visualize the Layout: Get a feel for the overall design and ensure the tiles will create a visually harmonious pattern across the entire surface.
- Identify Adjustments: Identify any areas that might require adjustments to achieve a symmetrical and balanced layout. This could involve making minor cuts to individual tiles or altering the starting point.
Maintaining Consistent Grout Lines:
Resist the urge to squeeze tiles closer together to minimize grout line width. Especially for larger tiles, maintaining proper spacing is crucial. Here’s why:
- Grout Functionality: Adequate space allows the grout to properly bond and perform its intended functions, which include:
- Stability: Grout helps stabilize the tiles, preventing them from shifting or cracking.
- Moisture Control: Grout acts as a barrier against moisture ingress, protecting the subfloor from water damage.
- Premature Breakdown: Insufficient spacing can lead to premature grout breakdown, compromising both aesthetics and functionality.
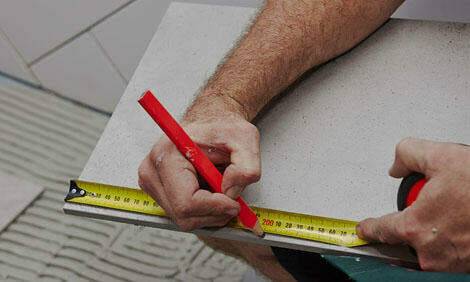
Marking the Layout:
Once you’ve achieved the desired layout through dry-fitting, use a pencil to mark the outer edge of the tiles on the subfloor. These markings will serve as a guide when you finally set the tiles in place with mortar, ensuring precise placement and a flawless final product.
Step 4: Preparing for Tile Modifications

The dry-fitting exercise sheds light on potential adjustments needed to achieve the perfect layout. You might identify areas requiring tile cuts to ensure a seamless fit along the edges or around obstacles.
Determining the Cutting Approach:
There are two main approaches to incorporating cut tiles:
- Pre-Cutting: Cut the tiles before setting them in place. This approach offers greater control over the layout and minimizes the risk of damaging already installed tiles.
- Full-Tile Installation with Subsequent Cutting: Install the full-size tiles first, allowing them to dry completely. Then, precisely cut and install the remaining pieces to fill any gaps. This method can be more time-consuming but might be preferable for specific layouts or for individuals less comfortable with pre-cutting.
The Importance of the Right Tools:
Since cutting ceramic tiles requires precision and care, using the appropriate tools is paramount. Here’s a basic overview of suitable options:
- Manual Tile Cutter: Ideal for straight cuts on smaller tiles.
- Wet Saw: Offers greater versatility for intricate cuts on various tile sizes and thicknesses. While providing cleaner cuts, wet saws require more setup and are generally bulkier than manual cutters.
Choosing the Right Tool: The suitable tool depends on the complexity of the cuts, your budget, and personal comfort level. Consider the number of cuts required, the type of cuts (straight vs. intricate), and your experience level when making your selection.
Remember, this step requires patience and meticulous execution. If you’re new to tile cutting, practice on scrap tiles to get comfortable with the tools and techniques before attempting cuts on your actual project tiles.
Step 5: Applying Thin-Set Mortar

With the layout perfected and cutting requirements identified, it’s time to embark on the actual tile installation. This step involves adhering the tiles to the subfloor using thin-set mortar, the foundation for a secure and long-lasting installation.
Choosing the Right Mortar:
- Moisture Considerations: Pay close attention to the room’s intended use. For areas prone to moisture, such as kitchens, bathrooms, or hallways, opt for a waterproof thin-set mortar. This ensures optimal adhesion and protects against water damage.
Drying Time and Communication:
- Refer to Label Instructions: Always check the manufacturer’s instructions on the thin-set mortar label to determine the specific drying time.
- Client Communication: Clearly communicate the drying time to your clients or anyone involved in the project. Emphasize the importance of avoiding foot traffic on the newly installed tiles during this crucial period. Walking on the tiles prematurely can disrupt the bonding process, potentially leading to loose tiles and cracked grout joints.
Mixing and Consistency:
- Thin-Set and Water: Thoroughly mix the thin-set mortar with water following the manufacturer’s recommended ratio. Aim for a consistency similar to mayonnaise.
- Resting Time: Allow the mixed thin-set to rest for approximately ten minutes before applying it to the subfloor. This resting period allows the air bubbles to rise and escape, ensuring optimal adhesion.
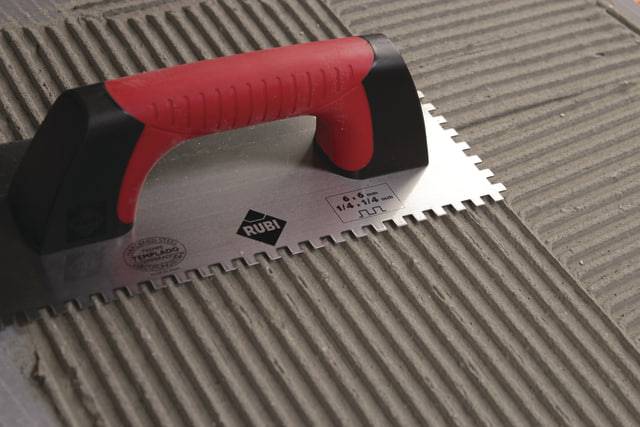
Spreading the Mortar:
- Trowel and Technique: Utilize a notched trowel to spread the thin-set mortar across a manageable section of the subfloor. Hold the trowel at a 45-degree angle and apply the mortar with a firm, sweeping motion.
- Maintaining Consistency: Ensure a uniform, thin layer of mortar is spread across the entire section. Avoid creating any bulges or gaps, as these inconsistencies can affect the final appearance and stability of the tile installation.
Remember, applying thin-set mortar sets the stage for a successful and visually appealing tile installation. Meticulous execution during this step is crucial for a long-lasting and beautiful outcome.
Step 6: Setting the Ceramic Tiles
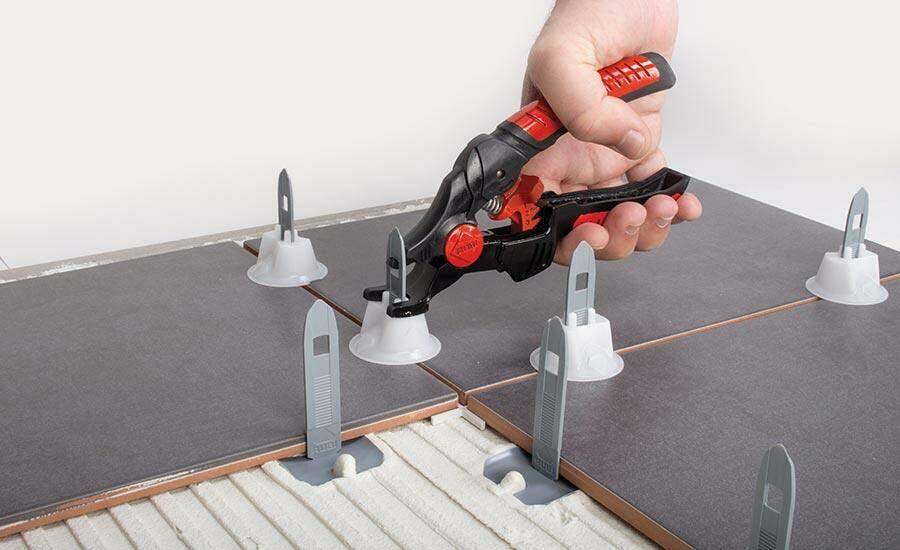
With the thin-set mortar acting as a secure foundation, it’s time to meticulously place the ceramic tiles, transforming your vision into reality.
Gently Place and Press:
- Carefully Lower the Tile: Gently lay the tile onto the prepared thin-set mortar section.
- Firm but Gentle Pressure: Apply firm yet gentle pressure with your fingertips to set the tile firmly in place.
- Twisting Motion: As you press, perform a slight twisting motion with your wrist. This helps spread the adhesive evenly across the back of the tile, ensuring optimal bonding.
Strategic Placement:
- Starting Point: Begin laying the tiles from the center of the room and work your way outwards towards the walls. This approach helps maintain a balanced and symmetrical layout.
- Maintaining Consistency: As you place each tile, apply consistent finger pressure throughout the entire surface. This helps prevent lippage, which refers to unevenness or tiling inconsistencies across the surface.
Maintaining Vigilance:
Throughout the setting process, keep a watchful eye for any potential issues:
- Unevenness: Regularly check for lippage using a level and make adjustments as needed.
- Adhesive Coverage: Occasionally lift a corner of a tile to ensure the back is completely covered with thin-set mortar. If not, apply additional mortar to the tile back (back-buttering) before placing it back in position.
Remember, patience and precision are key during this step. Take your time, carefully set each tile, and address any inconsistencies promptly for a flawless and long-lasting installation.
Step 7: Grouting and Sealing
Once the thin-set mortar has fully cured (refer to the manufacturer’s drying time recommendations), it’s time to add the finishing touches: grouting and sealing.
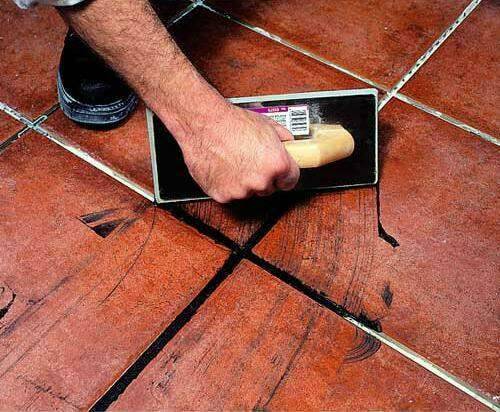
Grouting:
- Mixing the Grout: Thoroughly mix the grout according to the manufacturer’s instructions until you achieve a smooth, yet firm paste consistency.
- Spreading the Grout: Utilize a grout float to spread the grout diagonally across the entire tiled surface, ensuring it fills the joints completely.
- Forcing the Grout: Employ a grout jointing tool to forcefully press the grout into the joints, eliminating any air pockets and achieving a consistent appearance.
Cleaning and Maintaining:
- Excess Grout Removal: Once the grout has slightly set (refer to the manufacturer’s recommendations), use a damp sponge to remove excess grout residue from the tile surface. Rinse the sponge frequently and change the water often to maintain cleanliness. This step may require multiple passes to achieve a desirable finish.
- Buffing and Cleaning: After the grout has fully dried (refer to the manufacturer’s recommendations), utilize a dry cloth to buff any remaining haze from the tile surface.
- Vinegar Rinse (Optional): For stubborn dirt or residue, consider a diluted vinegar solution (one part white vinegar to ten parts water) as a final cleaning step. Ensure the surface is completely dry before proceeding.
Sealing the Grout:
- Applying the Sealer: For optimal protection and longevity, apply a grout sealer following the manufacturer’s instructions. Sealing helps prevent stains, moisture absorption, and the growth of mold and mildew.
Epilogue: A Job Well Done!
After dedicating your time and effort, you’ve successfully navigated the journey of installing your ceramic floor tiles. While the process may have demanded patience and perseverance, the outcome stands as a testament to your dedication.
A Well-Deserved Reward: Take a moment to acknowledge your accomplishment. You’ve not only transformed your space but also crafted a durable and aesthetically pleasing floor that will endure for years to come.
Beyond Functionality: Similar to the enduring mosaics adorning ancient structures, your tile installation transcends mere functionality. It becomes a work of art, a personal touch that injects your unique style and effort into your space.