
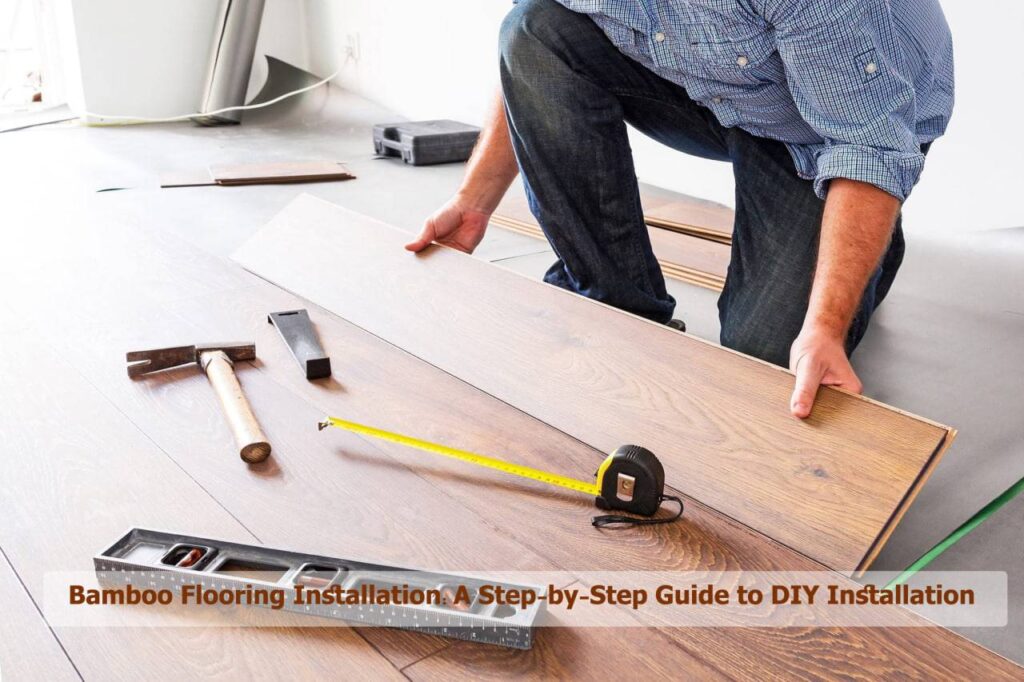
Elevate your space with the warm elegance and eco-friendly charm of bamboo flooring. Known for its durability and timeless appeal, bamboo offers a unique aesthetic that complements both modern and traditional interiors.
But what if you could skip the hefty bamboo flooring installation costs and transform your room yourself? It’s easier than you think!
This comprehensive guide will walk you through every step of installing bamboo flooring, from prepping your subfloor to achieving a professional-looking finish.
With clear instructions, helpful tips, and a touch of inspiration, you’ll be ready to embark on your DIY bamboo flooring journey and create a floor you’ll love for years to come.
So, grab your tools, unleash your inner handyman, and get ready to witness the magic of bamboo unfold beneath your feet!
Before You Begin:
- Gather Your Tools and Materials: Consider listing items in their logical order of use (e.g., measuring tools first, then adhesives and installation tools).
- Prepare the Subfloor: “Test moisture content with a moisture meter; it should be 16% MC or below” can be rephrased as “Use a moisture meter to ensure the subfloor is 16% MC or below.”
- Acclimate the Bamboo Planks: You could add a note about storing the planks flat and protected from moisture during acclimation.
Installation Steps:
- Step 1: Roll out the underlayment and cut it to size. (Add step numbers for each instruction)
- Step 2: Lay the first bamboo plank against the wall, leaving a 10 mm expansion gap around the perimeter. Use floor spacers to maintain the gap. (Start each step with a clear action verb)
- Step 3: Apply PVA glue to the end of the next plank and slot it into place. (Continue numbering steps consecutively)
- Step 4: Continue laying the planks in rows, cutting them to size as needed and staggering the joints. Use PVA glue to adhere each plank and floor spacers to maintain the expansion gap. (Combine sentences for conciseness)
- Step 5: When reaching the opposite wall, measure the gap and cut the plank to size, accounting for the expansion gap. Glue the plank along the full length and width, and use a pulling bar and hammer to close any gaps. (Improve clarity by separating actions with semicolons or bullet points)
- Step 6: Repeat steps 3-5 to complete the floor area. (Reference previous steps clearly)
Adding the Finishing Touches to Your Bamboo Floor:
For a seamless and professional look:
- Connect your bamboo floor to other surfaces: Install transition strips at doorways and other areas where your bamboo flooring meets different types of flooring. This will create a smooth transition and protect the edges of your bamboo planks.
- Trim edges neatly: Depending on the installation method and layout, you may need to trim the edges of your bamboo flooring to fit snugly against walls or other obstacles. Use a sharp saw or cutting tool appropriate for bamboo.
Cleaning up for the final reveal:
- Mop it up: Give your new bamboo floor a gentle cleaning with a damp mop and a mild wood cleaner. Avoid using harsh chemicals or excessive water, as this can damage the flooring.
Pro Tips for Bamboo Flooring Installation:
- Be manufacturer-wise: Every bamboo flooring comes with specific installation instructions. Always prioritize the guidelines provided by the manufacturer for your specific product.
- Patience is key: Don’t force planks together! If they don’t click or lock easily, check for alignment issues and adjust accordingly. Rushing can lead to mistakes and unnecessary frustration.
- Small steps, big results: Tackle the installation in manageable sections. This allows for better focus and minimizes the risk of errors.
- Enjoy the process: Take your time and savor the experience of creating a beautiful and sustainable addition to your home. Installing bamboo flooring can be a rewarding journey, so embrace the learning and accomplishment.
Embrace the beauty of bamboo:
With careful planning, these simple steps, and a sprinkle of DIY spirit, you can transform your space with the warmth and elegance of bamboo flooring. Remember, a little effort goes a long way in creating a stylish and sustainable home that reflects your personality and values.
Prepping Your Canvas: The First Step to Stunning Bamboo Flooring
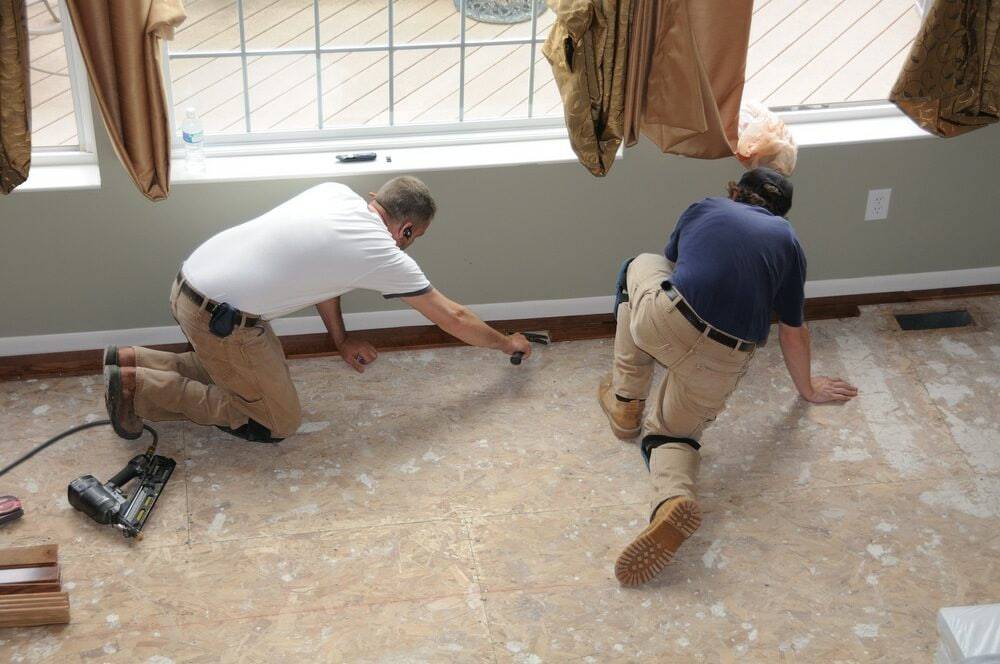
The very first step towards a beautiful new bamboo floor lies in preparing your subfloor. This crucial step creates a smooth, level, and stable foundation, essential for lasting enjoyment. Let’s break down what this involves:
Moisture Check: Friend or Foe?
Grab your moisture meter, your handy ally in assessing the subfloor’s moisture content (MC). Ideally, for optimal bamboo floor installation, the MC should be 16% or below. Higher levels increase the risk of warping and buckling later on. Don’t settle for a single reading! Take measurements across different areas of the subfloor to get a complete picture. If the MC exceeds 16%, drying steps are necessary before proceeding.
Cleaning Up: Farewell, Dust Bunnies!
Sweep away any dirt, dust, or debris. A clean subfloor ensures good adhesion and prevents unwanted bumps under your bamboo planks. Next, vacuum thoroughly, paying special attention to corners and crevices where dust bunnies love to hide. Ensure the subfloor is completely free of any contaminants.
Leveling Up: Achieving Smooth Perfection (if necessary)
Use a straight edge to assess the flatness of your subfloor. Any dips or bumps can create an uneven and uncomfortable walking surface. For minor imperfections like small gaps or unevenness, sanding might be enough to level the surface. But what about larger issues? If you encounter significant dips or bumps, consider using self-leveling compound or plywood to create a perfectly level base. Remember, a smoother subfloor translates to a better final outcome for your stunning bamboo flooring.
The Journey Begins!
By following these instructions carefully and ensuring a proper subfloor foundation, you’re taking the first crucial step towards a successful and beautiful bamboo flooring installation. This is just the beginning of your exciting journey, so stay tuned for further guidance!
Laying the First Row: Setting the Stage for Bamboo Perfection
With your subfloor prepped, it’s time to embark on the exciting step of laying the first row of bamboo planks! Remember, this initial row sets the foundation for the entire installation, so accuracy and attention to detail are key. Let’s delve into the crucial steps:
Choosing Your Starting Point:
Traditionally, most begin by laying the first row parallel to the longest wall. However, the choice is yours! Select a layout that best suits your space and personal preferences.
Positioning the First Plank:
With the groove facing the wall, gently place the first plank along your chosen starting line. Remember the critical 10mm expansion gap around the entire perimeter. Use floor spacers to maintain this gap consistently between the plank and the wall.
Connecting the Second Plank:
Grab your PVA glue specifically designed for bamboo flooring and apply a generous amount to the groove of the first plank’s end, where it will connect to the second. Now, carefully lift the second plank and slot its tongue into the glued groove, ensuring a snug fit. If needed, tap gently with a tapping block to achieve a secure connection.
Continuing the Row:
Carefully measure the remaining space in the row. Cut the last plank to fit, ensuring that the 10mm expansion gap at the wall is maintained. Remember, repetition is key here! Apply glue, connect planks, and tap them together, constantly checking for levelness and proper spacing throughout the row.
Staggering Joints: Strength and Beauty
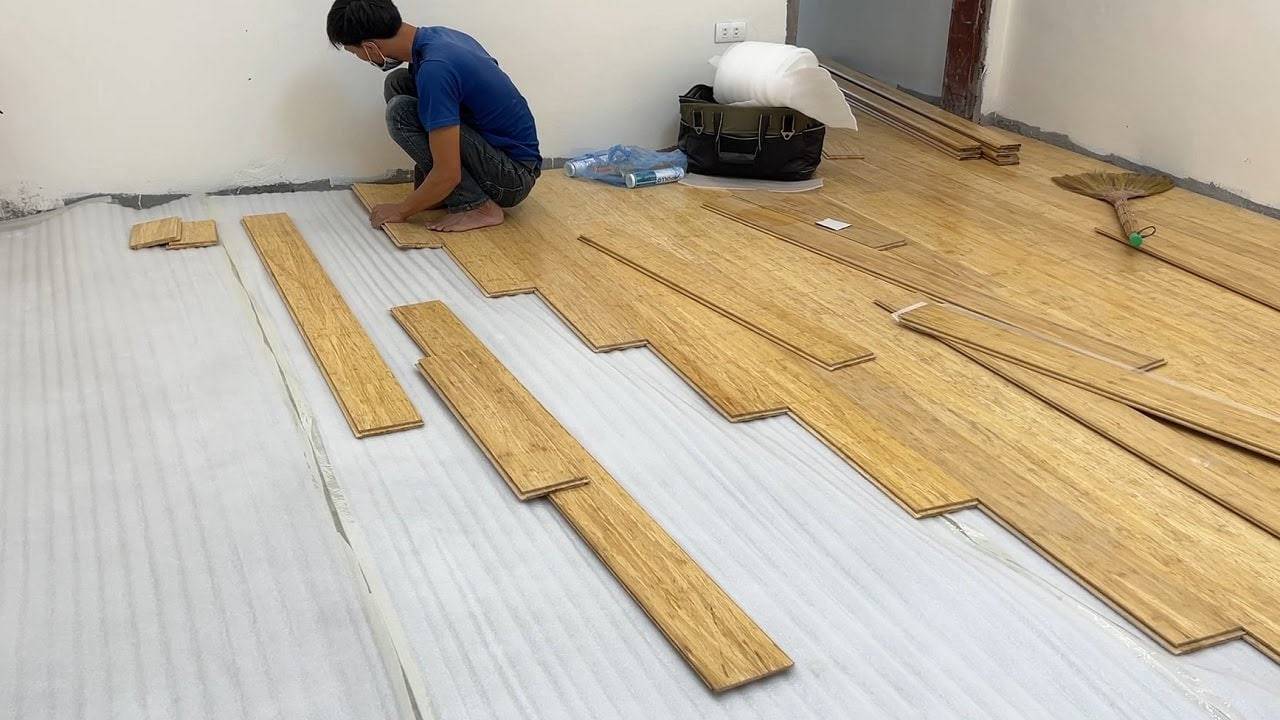
For a visually stunning and structurally sound floor, the second row should strategically begin with the offcut from the first. This creates a staggered joint pattern, preventing continuous seams and adding strength to the installation. As you lay subsequent rows, maintain this staggered pattern by alternating the starting plank length throughout the entire floor.
Pro Tip: Don’t force the planks! If they don’t click or lock easily, double-check for proper alignment and ensure the groove and tongue are clean and free of debris.
Building Your Bamboo Masterpiece: Rows & Completion
With the first row of staggered joints conquered, it’s time to transform your floor into a breathtaking bamboo expanse. Here’s the exciting next step:
Row After Row, Beauty Unfurls:
- The process mirrors your first-row triumph: apply glue, connect planks, gently tap them together, and remember the crucial expansion gap.
- Maintain the staggered joint pattern by starting each new row with the leftover piece from the previous row’s end.
- Remember to measure and cut each plank meticulously to fit perfectly, ensuring the expansion gap remains consistent throughout.
Meeting the Wall: A Seamless Encounter:
As you approach the opposite wall, carefully measure the remaining space. Remember to factor in the expansion gap by subtracting its width from the measurement.
- Cut the last plank to the exact size and generously apply glue along its entire length and width.
- Gently coax the plank into place using a pulling bar and hammer to close any small gaps between it and the wall.
The Grand Finale: Repeating & Completing:
Continue laying rows, meticulously following the same process until your entire floor area is adorned with beautiful bamboo. Remember to double-check for levelness and consistent spacing throughout the installation.
Pro Tips for Flawless Flooring:
- Work in manageable sections to minimize mistakes and ensure precision.
- Patience is key, especially when measuring and cutting planks. Take your time for optimal results.
- Avoid forcing planks together. Ensure proper alignment and clean connections for a seamless look.
- Employ a tapping block gently to secure the planks without causing damage.
With these steps and tips in hand, you’re well on your way to a stunning and durable bamboo floor that will be the envy of your home!
FAQs: Breathe Easy with Beautiful Bamboo Flooring
Q: What tools do I need for DIY bamboo flooring installation?
A: You’ll need a moisture meter, broom, straight edge, self-leveling compound/plywood (if needed), underlayment, tape measure, PVA glue, saw, tapping block, floor spacers, pulling bar, hammer, and bamboo flooring planks.
Q: How do I ensure a level subfloor?
A: Use a straight edge to check for unevenness. Address minor dips with sanding and larger issues with self-leveling compound or plywood.
Q: What happens if I don’t leave an expansion gap?
A: Skipping the expansion gap can lead to warping and buckling of the bamboo planks as they expand and contract with temperature and humidity changes.
Q: Can I install bamboo flooring myself if I’m not handy?
A: While some experience is helpful, bamboo flooring installation can be tackled with good planning, careful attention to detail, and this guide as your reference.
Q: Is bamboo flooring durable?
A: Yes, when properly installed and cared for, bamboo flooring can be highly durable and last for decades.
Q: Is bamboo flooring waterproof?
A: While naturally water-resistant, bamboo is not waterproof. Avoid prolonged exposure to moisture and clean spills promptly.
Q: What type of cleaning products should I use on bamboo flooring?
A: Avoid harsh chemicals and opt for gentle cleaners specifically designed for wood or bamboo floors. Regular sweeping and occasional damp mopping are sufficient.
Q: Can I refinish bamboo flooring if it gets scratched?
A: Yes, unlike hardwood, bamboo can be refinished with polyurethane coatings designed for bamboo.
Q: Is bamboo flooring an eco-friendly choice?
A: Yes, bamboo is a fast-growing and renewable resource, making it a more sustainable choice compared to some traditional hardwoods.
Q: Where can I purchase bamboo flooring?
A: Bamboo flooring is available at local home improvement stores, online retailers, and specialty flooring companies.
Q: How much does DIY bamboo flooring installation cost?
A: The cost can vary depending on the size of your space, chosen materials, and tools you already own. Generally, DIY installation is significantly cheaper than professional installation.